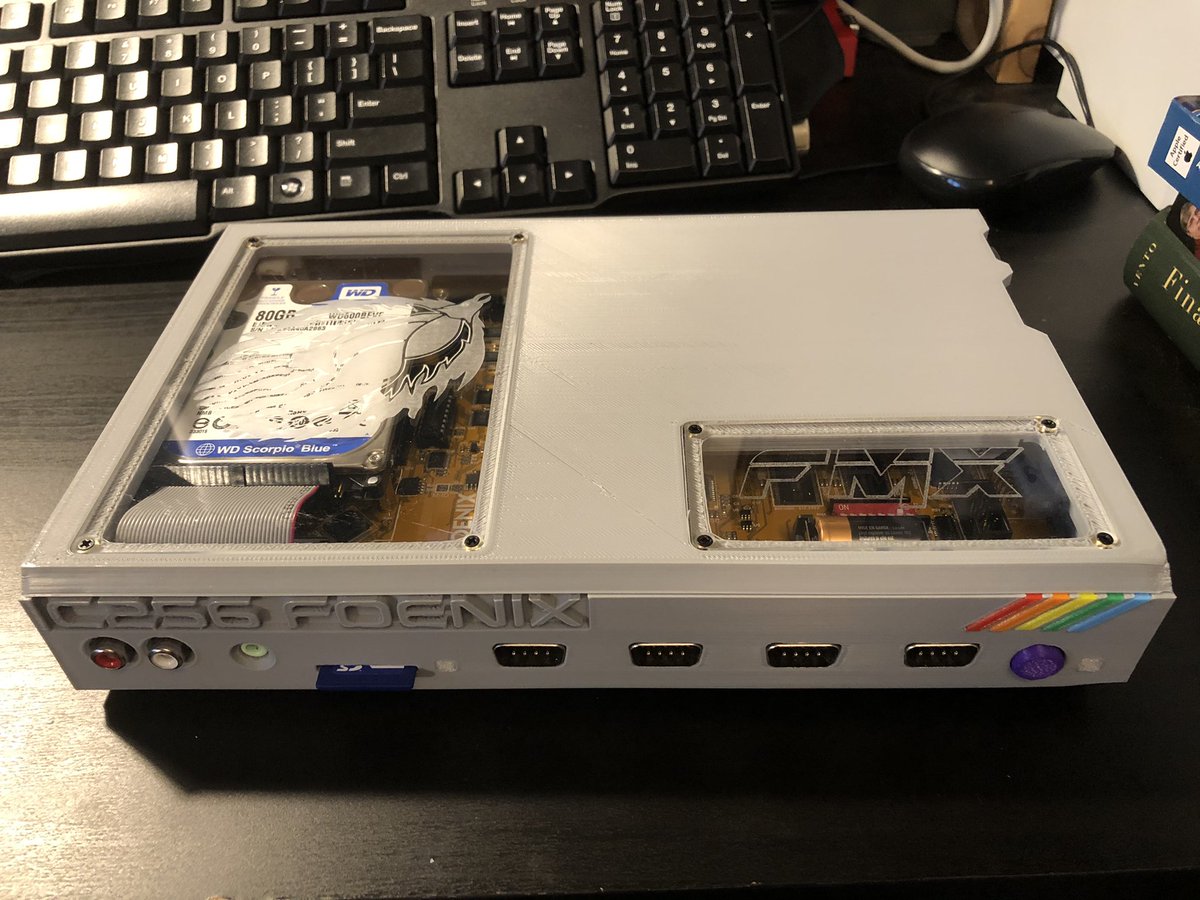
Opening the C256 Foenix FMX case
A short tutorial on opening the #c256foenix FMX case. It is quite serviceable but there are a few things to note. For starters, the panels on top provide access to the JTAG ports, DIP switches, and RTC battery with tiny Philips-head screws, if that’s all you need. (1/n)
The case is two pieces: top+back, and front+bottom. They’re held together in the back by one Philips screw and the port screw terminals. With these removed, slide off the top, careful of the ribbon cable attaching the floppy drive (attached to the top) to the board. (2/n)
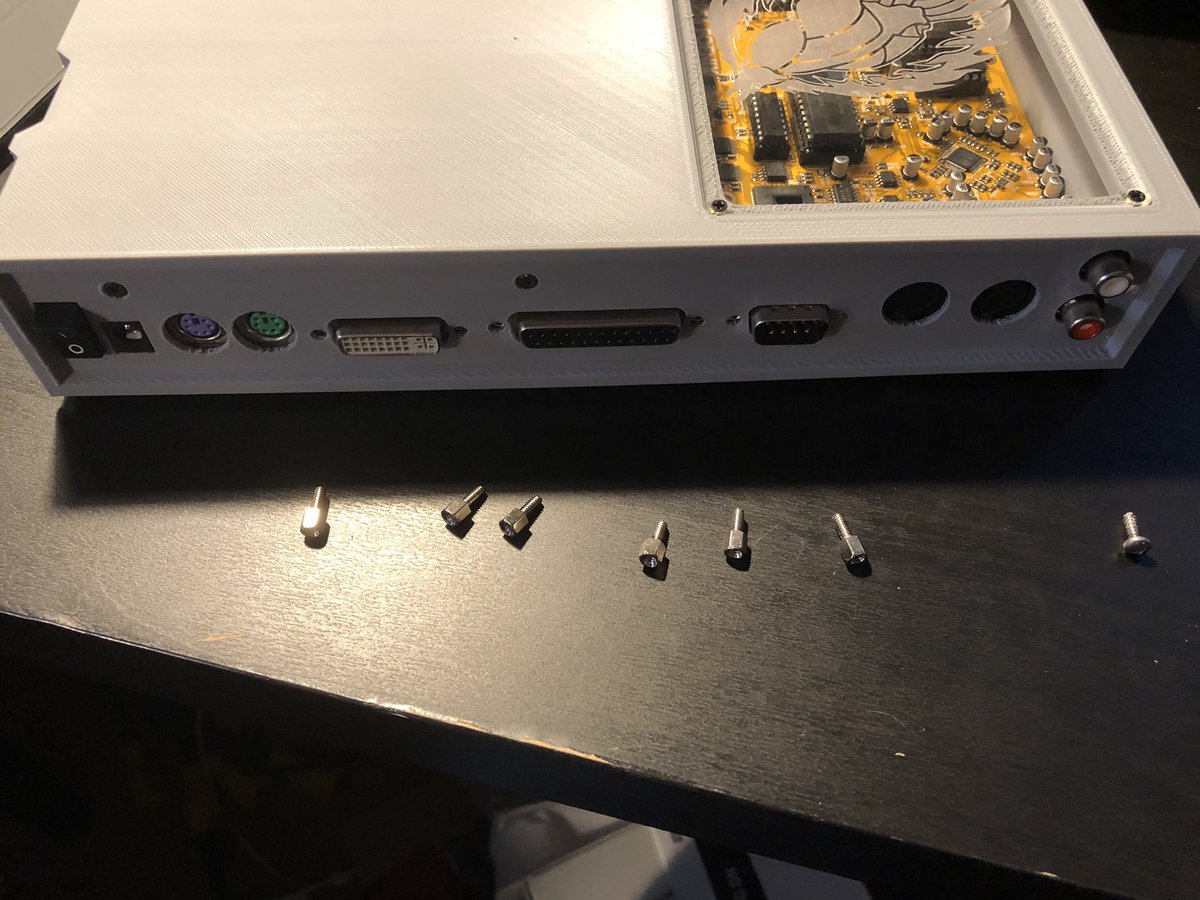
The floppy ribbon pulls out straight up. It’s held in with friction, no connector. You can push it back in. Also, the metal sheaths on the parallel and serial ports may fall off, that’s normal. You’ll need to line those back up on reassembly. (3/n)
To remove the board entirely, there are six (6) hex screws holding it to the bottom of the case. With these removed, the board lifts out easily. The plastic reset button cap will pop off from the front; you’ll push it back on. (4/n)

The battery for the Real Time Clock is type CR2. It goes in the direction indicated on the holder. (5/n)

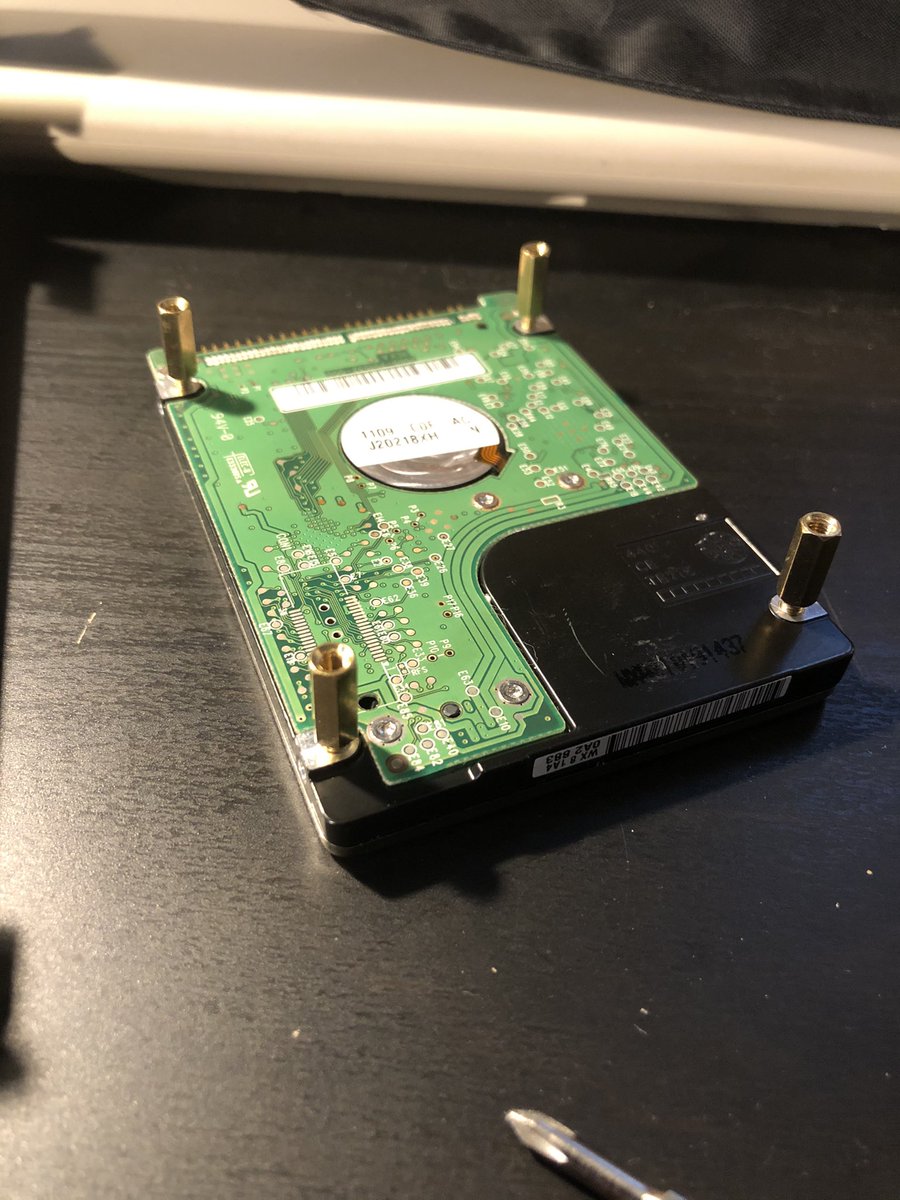
You can install a 2.5” IDE hard drive, too! You’ll use an extra short 44-pin IDE cable, four 12mm M3 standoffs (male to female) and four M3 screws. Standoffs screw into the drive, screws hold it to the board. (6/n)
Note that I don’t have the hard drive working yet. Foenix doesn’t have on-board partitioning and formatting software yet, and is limited to one 2GB FAT32 LBA partition, 512 byte block size. A similarly formatted SD card works today in the card slot.
This works for an SD card, and is supposed to work for the HD as well. Connect the card/drive to a Windows machine. Open Disk Manager (ask Cortana, “Create and format disk partitions”), select the disk, and create a single partition up to 2GB. (8/n)
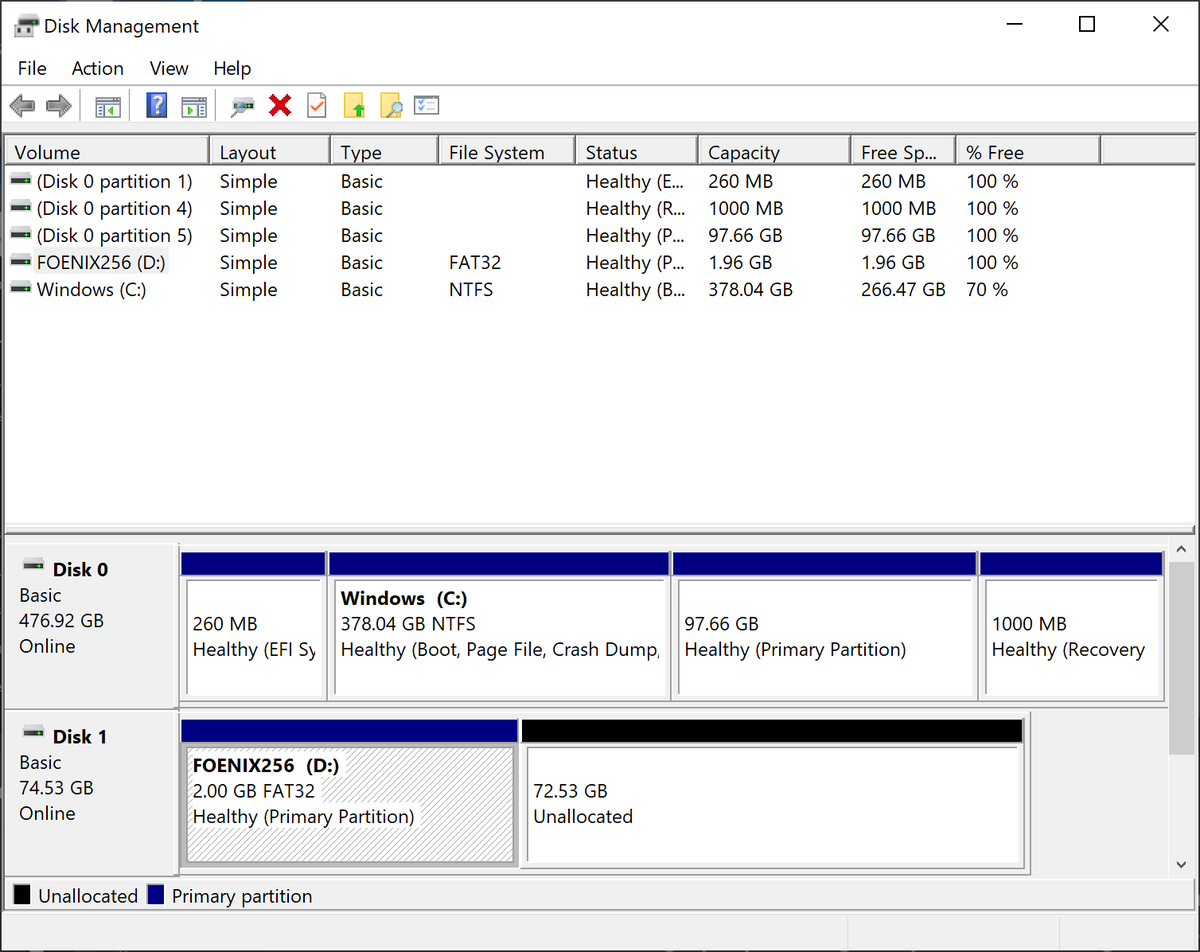
Next, you will use the “diskpart” tool to set the partition type to FAT32 LBA. Press Windows + R, and type “diskpart”. This opens a terminal window with a DISKPART> prompt. Run the commands shown here to set the type to “0C”:
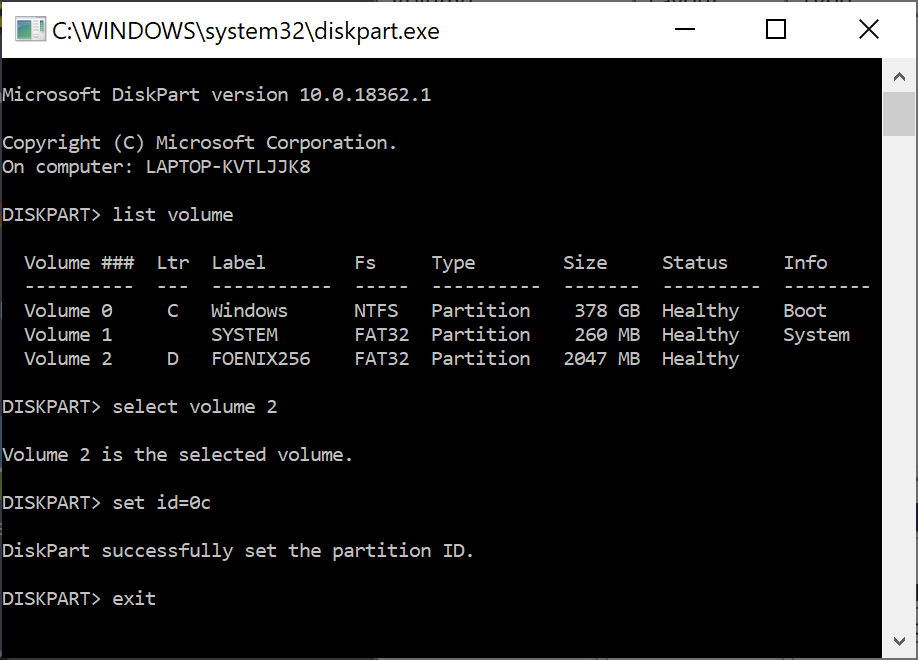
list volume select volume 2 (or whatever volume the disk is) set id=0c exit
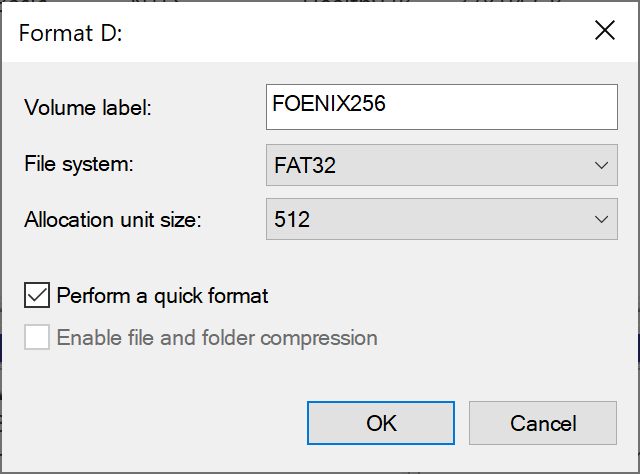
Back in Disk Manager, format the partition with File system FAT32 and Allocation unit size 512. Quick format is fine. (11/n)
That’s it! Eject the media (use the USB device ejector in the taskbar, or from Explorer if an SD card), and install it in the Foenix.
Again, I’ve got this working for SD cards, but not yet for the hard drive. (12/n)
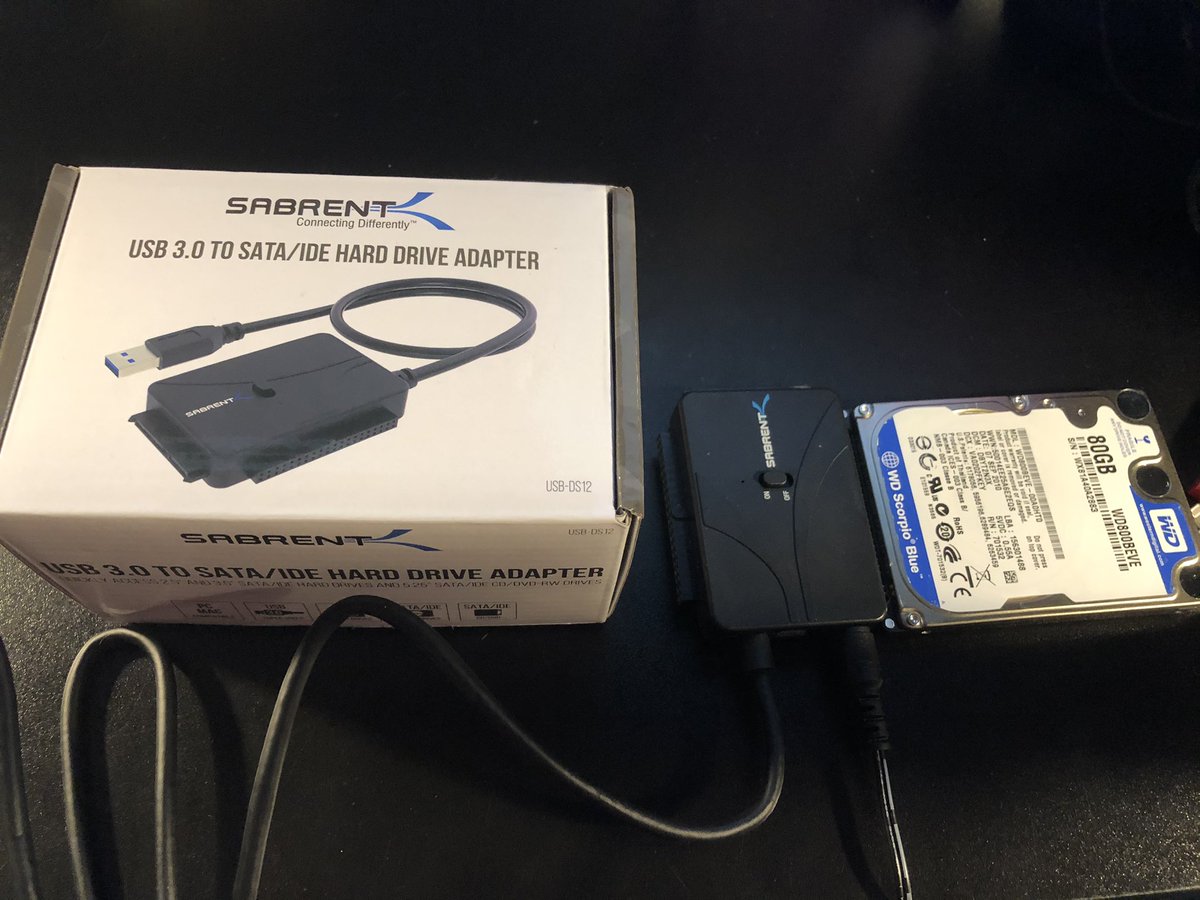
fwiw, I’m using a Sabrent USB 3.0 to SATA/IDE hard drive adapter with the drive. Pretty handy! (13/n)
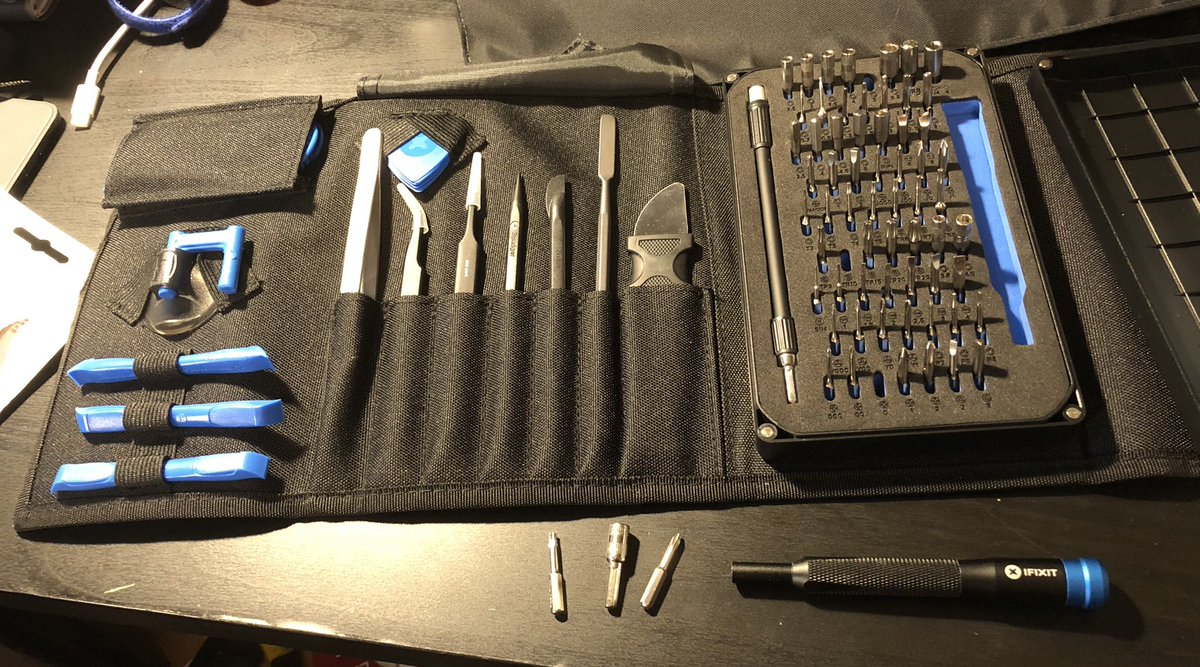
As always, the iFixit toolkit has all the bits you’ll need. Can’t resist an opportunity to praise it, it’s too useful. ifixit.com/Store/Tools/To…
Thanks to @StefanyAllaire and the core Foenix devs for all of the support in the Foenix Discord! Disk support is still early days, but it’s been fun testing out all of the features. (end)
I forgot to mention a useful tip: When pulling off the top of the case, it gets a little stuck on the back audio ports. Push the white audio jack with your thumb while pulling the top back towards you and it’ll pop right out. :)
(Originally posted to Twitter on November 23, 2020. It received 16 likes and 4 retweets.)