Building a Sega game controller adapter
Thanks to the sega-adapter project by Eyvind Bernhardsen and the 8bitDo Retro Receiver, I can connect my Nintendo Switch Pro game controller to my MEGA65.
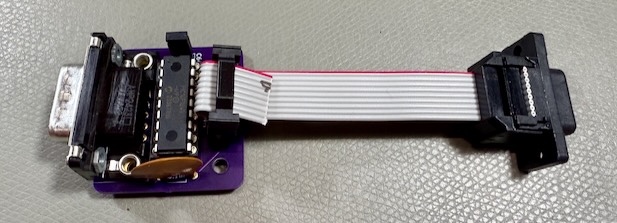
Last month, I published a feature article for my MEGA65 newsletter about Commodore-compatible game controllers. I mentioned the sega-adapter project by Eyvind Bernhardsen, a fun way to connect Sega Genesis-style game controllers to Commodore computers. These aren’t for sale pre-assembled anywhere, but they looked easy to assemble, so I ordered some boards and parts. I’m happy to report that it’s a fun and easy project!
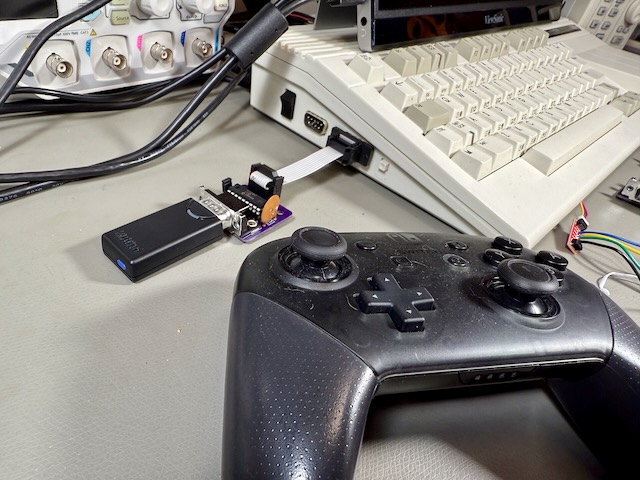
The Sega Genesis (aka Mega Drive) game console had a controller that was well liked at the time. It used the same 9-pin connector as Commodore and Atari computers, but did not use the same wiring protocol. Don’t try connecting one directly to a a Commodore! This will likely damage the Commodore’s sensitive CIA chip. Some people like the Genesis controller so much that there’s demand for an adapter that allows it. Here’s a simple adapter available from Retro Rewind.
The sega-adapter project uses an inexpensive PIC microcontroller that translates the signals and adds useful features, such as the ability to switch button configurations simply by holding certain buttons. I was especially interested in this design because it supports the 3-button protocol that I describe in the newsletter, an extension of the Commodore 64GS controller protocol for multi-button gaming beyond the original one-button Atari joystick. Because the PIC is re-programmable, I imagine it might be possible to support the 5plusbuttonsJoystick protocol as well, though I haven’t tried this yet.
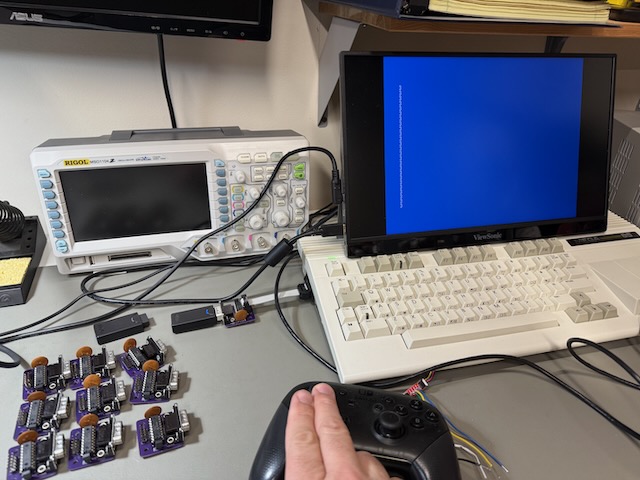
As recommended in the sega-adapter documentation, this project works especially well with the 8bitDo Retro Receiver for Sega Genesis ($16 on Amazon). The 8bitDo Retro Receiver pairs with almost any modern Bluetooth game controller, including Nintendo, Playstation, and older Xbox controllers (but not newer Bluetooth LE Xbox controllers). 8bitDo also makes a Bluetooth Sega Genesis gamepad; be sure to get the M30 Bluetooth model, not the “M30 2.4G wireless” model. Within minutes of assembling my first sega-adapter, I got my Nintendo Switch Pro controller to be a 3-button game controller for my MEGA65!

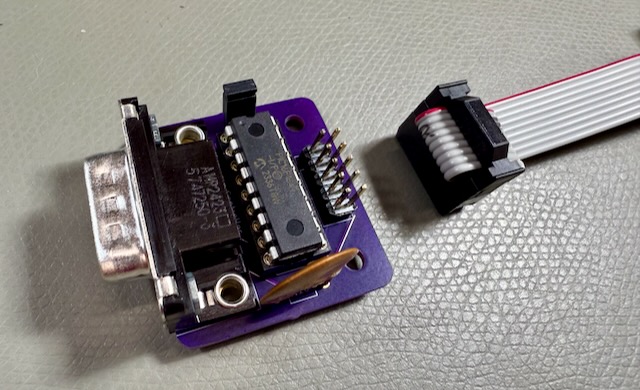
The sega-adapter is uses the following parts:
- A small custom circuit board
- A 9-pin male connector, for the incoming Sega Genesis controller signal (such as the 8bitDo Retro Receiver)
- A PIC microcontroller
- A capacitor
- Header pins, and a “pigtail” cable for the 9-pin female connector that goes to the MEGA65 (or what have you)
- Optional header pins and jumper to switch between C64 and Amiga modes—or you can just use solder to set it to C64 mode permanently
That’s it. If you buy the exact parts recommended by the project, everything goes together using a soldering iron and something to apply crimping force to the pigtail’s ribbon cable. I got the boards from OSHPark and parts from Digikey, for a total unit cost of about $16 each for a batch of ten adapters. The recommended 9-pin connectors were the most expensive parts, and you might be able to find cheaper ones in different form factors, if you’re willing to get crafty. I appreciated how the project’s design and parts list were chosen to be easy to assemble.
You also need an inexpensive PIC microcontroller programmer such as a generic “PICKit3” device. I bought one for $33 on Amazon. I’d never worked with PIC microcontrollers before! You can spend $200+ on an official dev kit, but from what I can tell this isn’t necessary for hobbyist applications. For software, you just need the free version of Microchip MPLAB X IDE and the pre-built release of the sega-adapter .hex file. Of course, the source is also available, and MPLAB X can compile it if you want to customize.
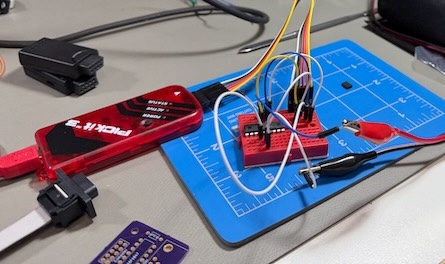
To program the PIC, put it on a breadboard, then connect five of the wires of the PICKit3 to pins of the PIC, as described in the pinout diagrams (which I’m including below). Leave the sixth wire disconnected. You also need to apply about 5 volts of DC power across the PIC power pins. The PICKit3 does not supply power the microcontroller, and it needs to be powered to accept programming. You can use a little battery box, a wall wart of appropriate voltage, or a bench power supply.
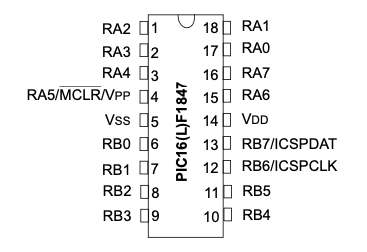
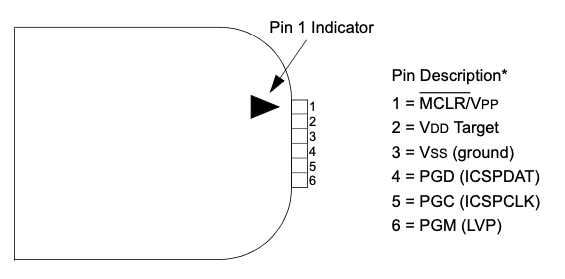
It was a fun afternoon project, with a satisfying result. I’ve always had a nominal interest in microcontroller-based projects but never really ventured far from Arduino boards in my own projects. I feel like I finally see the light on PICs and am inspired to try using them for other things.