Exploring MEGA65 hardware
Exploring MEGA65 hardware. Dan’s MEGA65 Digest for January 2023.
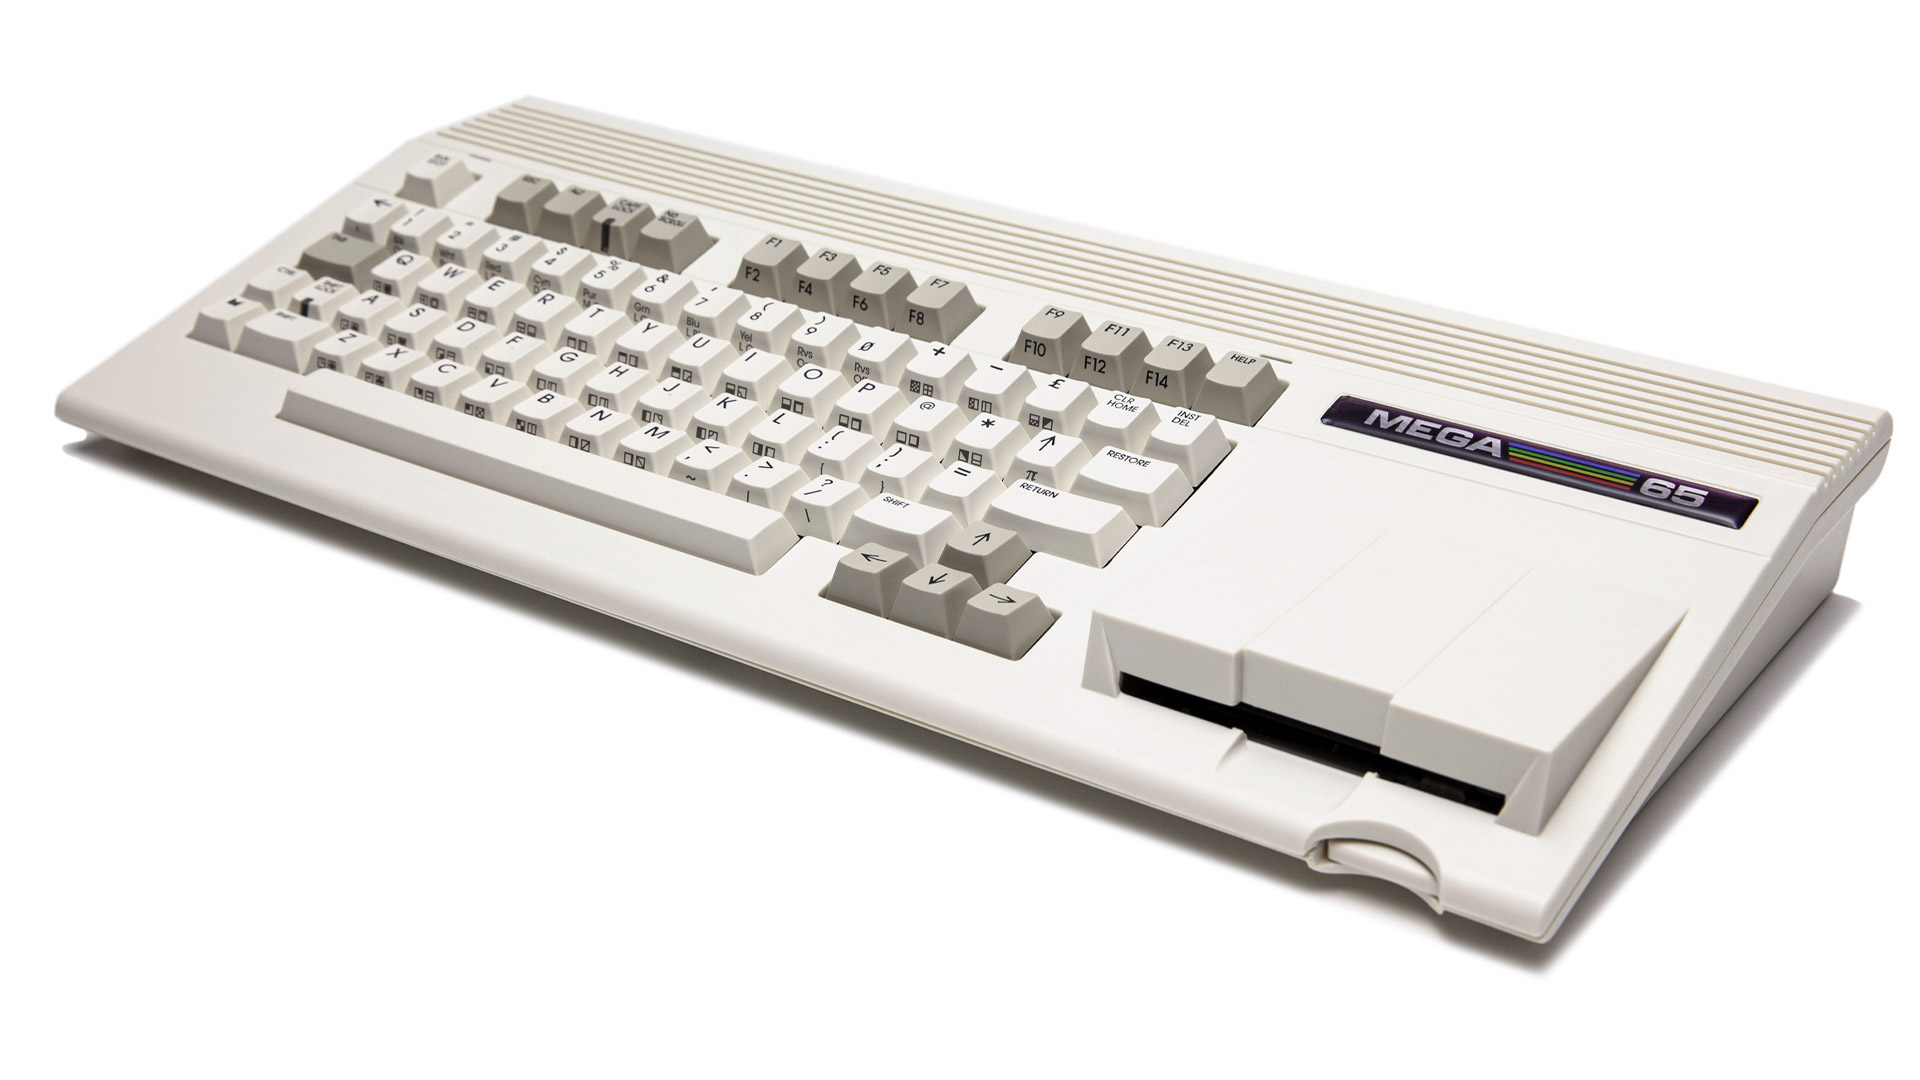
I think many of us were first attracted to the MEGA65 project for its hardware: the Cherry MX keyswitches in an authentic Commodore layout, the precision recreation of the Commodore 65 injection molded case, the 3-1/2" floppy drive—not to mention modern conveniences like HDMI video out and an SD card slot. It has taken nine years of hard work and persistence of vision to bring this project to the point of being something everyone can purchase and enjoy.
In this Digest, we’ll look at the recent history of the MEGA65 hardware, including the Nexys FPGA development board on which most of the firmware was written. We’ll take a tour of peripherals that work with the MEGA65, both vintage and new. And we’ll look at hardware experiments in progress that may provide a glimpse of the MEGA65’s future.
But first!
Resources for new owners
The latest batch of MEGA65s is being delivered, and it’s been super exciting to see all of the messages and photos from proud new owners in the Discord. If you’re a new owner, welcome to the world of personal computing!
We have many more resources for getting started with your MEGA65 than we did a year ago. There’s a new documentation landing page, which has links to the latest version of the User’s Guide.
Last year I wrote a MEGA65 Welcome Guide intended to help new owners get up and running. I’ve been keeping it up to date to be useful whether you received your MEGA65 last May or this January.
You’ve already found this Digest. You might also enjoy the back issues, available on the website.
That documentation landing page is part of the MEGA65 Wiki, a relatively new resource that we’re still building. If you’d like to contribute to the wiki, reach out to Gurce on the Discord chat server. You can also read and post articles on Filehost, another great resource.
Featured Files
It’s the Digest’s first recurring segment! Here at Featured Files, we look at cool stuff that has been posted to the MEGA65 Filehost. Download and try these on your MEGA65 today!
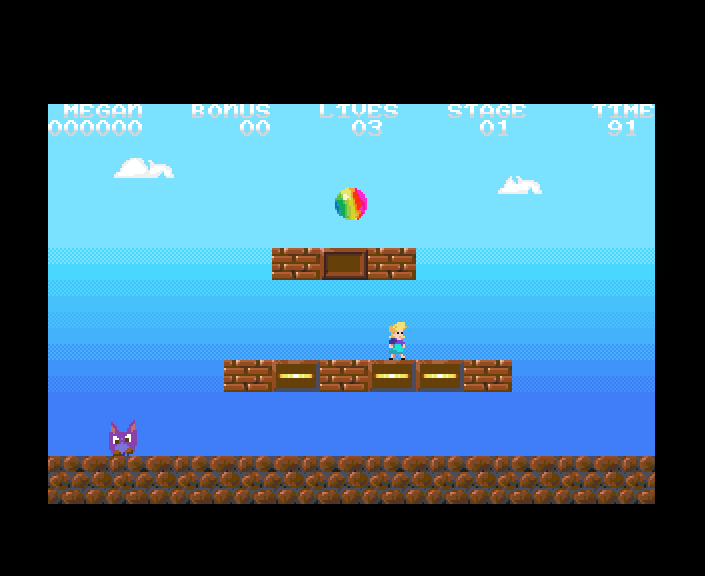
Mega Sisters, by Endurion
Mega Sisters, by Endurion. A version of the 1987 Commodore 64 classic The Great Giana Sisters, this multi-stage adventure pays homage to familiar side-scrolling platformers while adding a few twists of its own. Endurion, aka Georg Rottensteiner, is the author of C64 Studio, a Commodore cross-development IDE for Windows. You can download the source code for this MEGA65 game. Use a joystick in port 2; move up to jump.
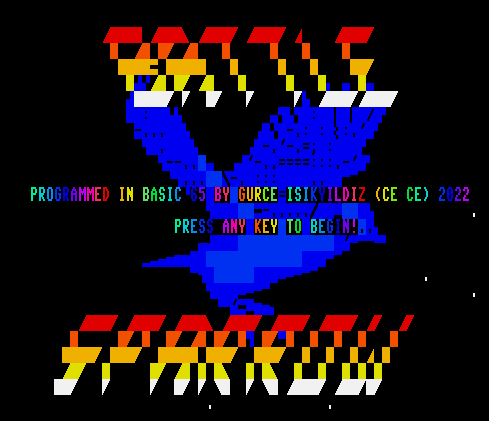
Battle Sparrow, by gurce
Battle Sparrow, by gurce. A vertical scrolling space shooter in the vein of Warhawk for the C64 (1986), this action game was written entirely in MEGA65 BASIC with PETSCII graphics, vibrant colors, and a rockin’ soundtrack. Use a joystick in port 2.

Barnsley Fern Fractal, by heath8041
Barnsley Fern Fractal, by heath8041. This elegant BASIC program renders the Barnsley fern at a resolution of 640x400. The disk image includes several programs to render the fractal in different ways. Run it yourself, or watch Heath-man’s video.
The MEGA65 hardware
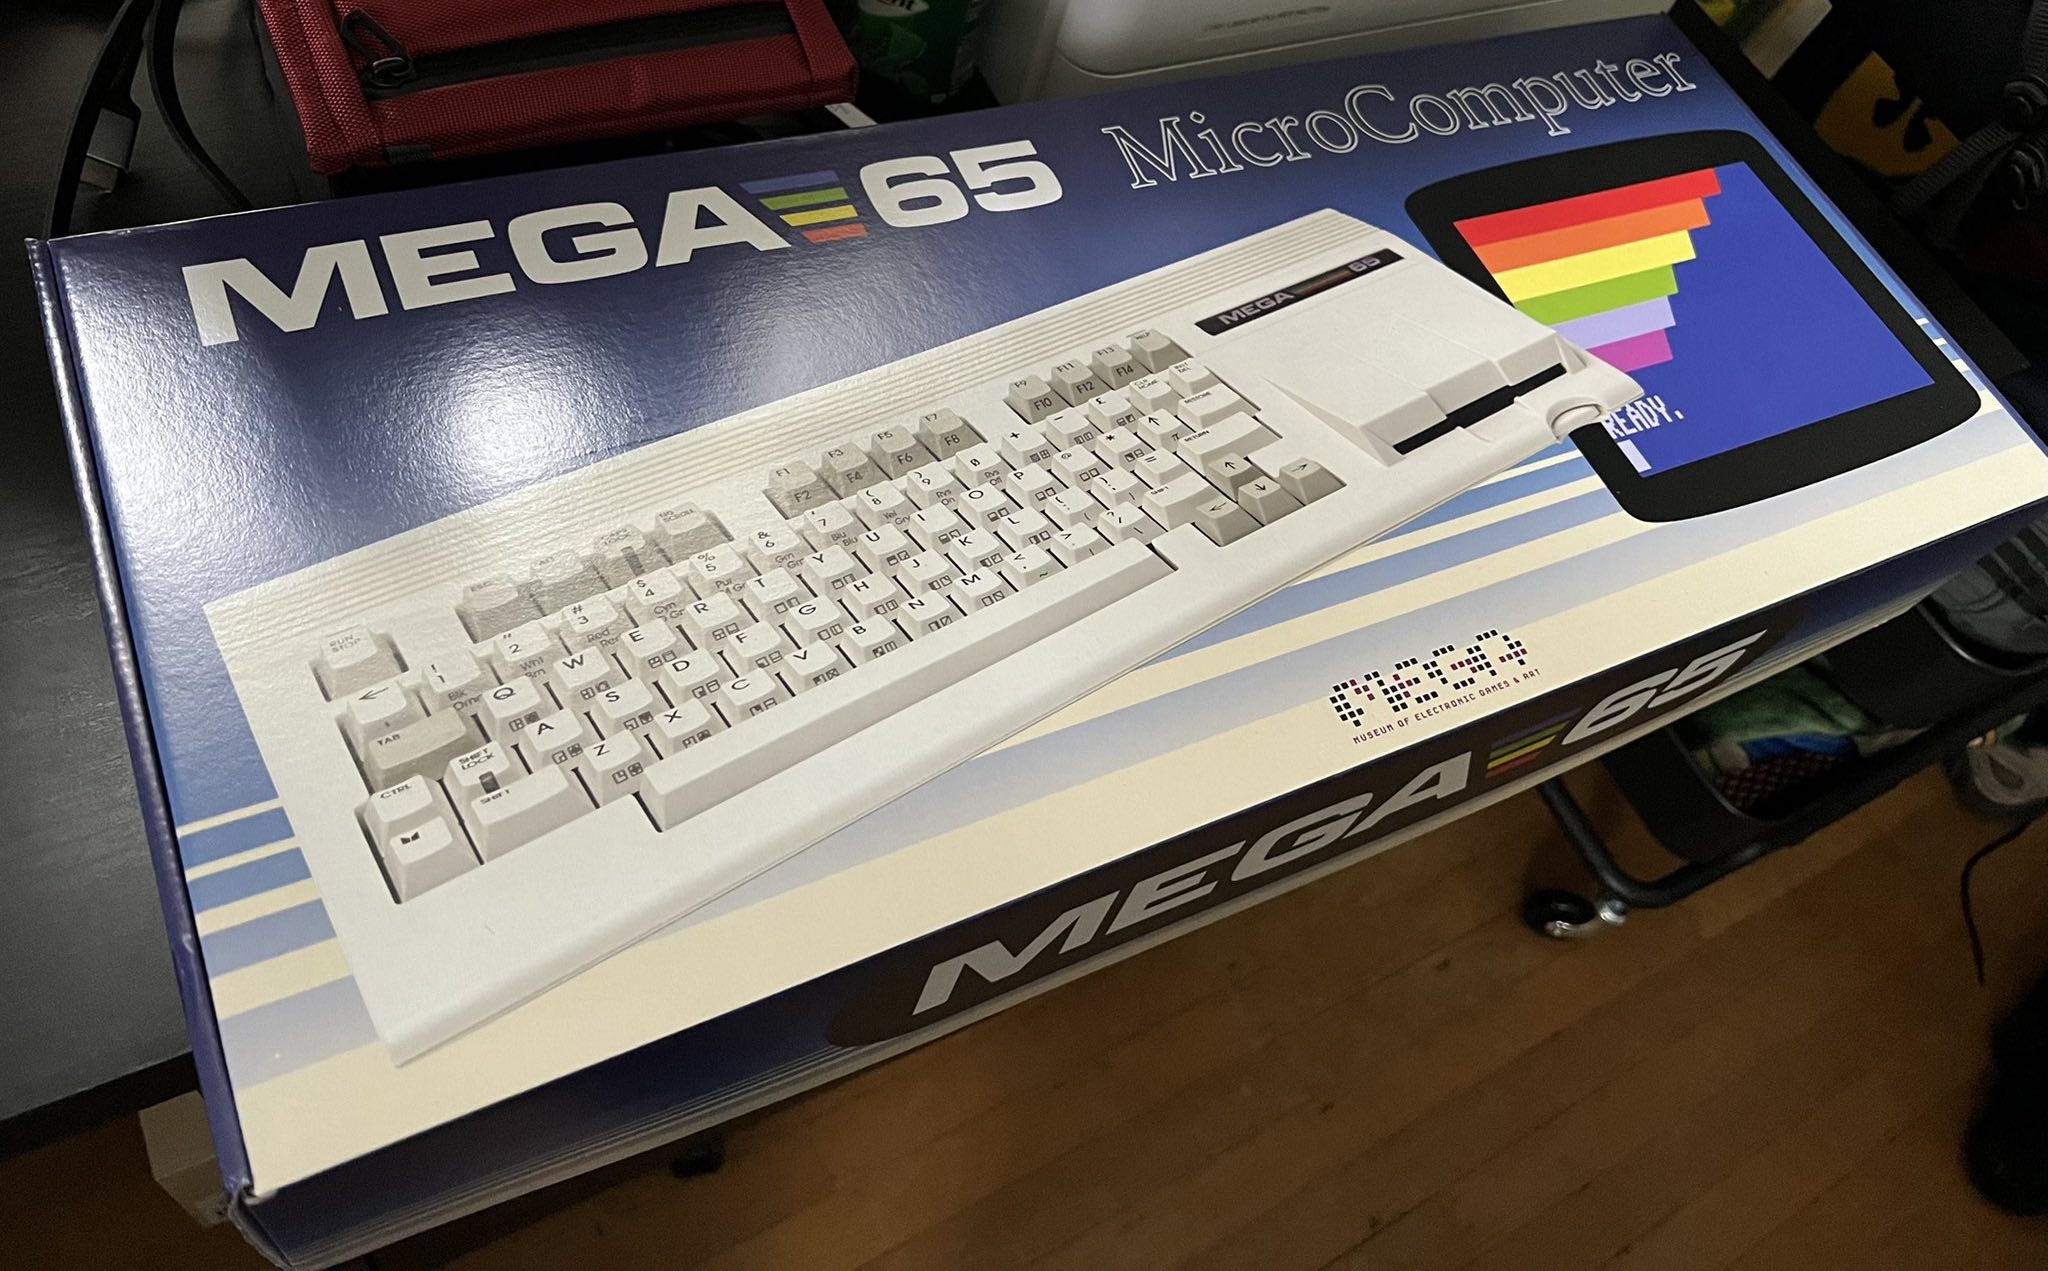
When you pre-order a MEGA65 from Trenz Electronic, you can expect to receive a faithful recreation of the unreleased Commodore 65 personal computer, with a few modern improvements. The first step of this experience is opening the rainbow-colored “retail” cardboard packing box. Inside the box is the MEGA65 computer, with its authentic injection-molded plastic case, keyboard with authentic layout and keycap designs using modern mechanical keyboard switches, and a refurbished 3-1/2" floppy drive.
The ports on the back and side of the computer are a mix of modern and familiar: a barrel-jack power connector, a C64-style cartridge port, an IEC serial port, VGA and HDMI video output, an ethernet jack, a microSD card slot, stereo audio output, and two DE-9 ports for joysticks, paddles, and mice.
Inside the MEGA65 is a circuit board populated with chips and connectors. Compared to its vintage ancestors, the MEGA65’s board is surprisingly spare, with less than a handful of devices that you might call chips and lots of empty green space. Also surprising are what appear to be extra unused connectors for diagnostic devices, additional stereo audio outputs, and unspecified peripherals. The keyboard is a separate device connected to the main board with a ribbon cable, as is the floppy drive. The main board also sports a removable full-size SD card pre-populated at the factory with software, and a CR1220 battery holder for the Real-Time Clock.
At the center of the MEGA65 is the Xilinx Artix-7 FPGA chip, a modern device that can be programmed to behave like other digital logic devices. Importantly, the FPGA replicates these behaviors electronically, as if these digital designs were etched in silicon. The MEGA65 firmware (or core) describes a complete chipset that in 1991 would have been a dozen permanently-etched chips arrayed across the board.
The MEGA65 has two smaller FPGA devices on the board, an Altera MAX10 for various electronic functions, and a Lattice device for the keyboard. There are three FPGA devices in total in the MEGA65.
This is the MEGA65 in its official form. It’s what you buy from Trenz Electronic, and it’s what the MEGA65 team does its best to support with regular testing and improvement of the firmware and system software. The MEGA65 has taken other forms in the past, and the expandability of the machine and open licenses of the designs are meant to encourage experimentation. Naturally, you install such expansions at your own risk.
From Nexys to MEGA
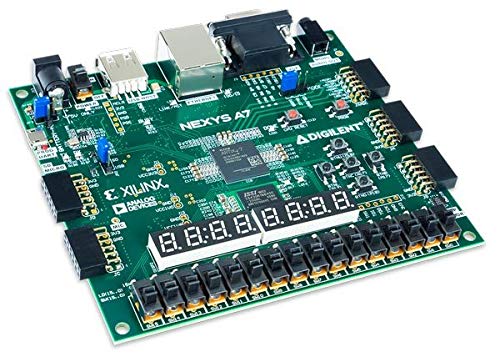
The MEGA65 as we know it went through multiple stages of hardware development over the years. Most of the MEGA65 core was built on the Digilent Nexys A7-100T FPGA trainer board, a bare circuit board that electronics designers use to evaluate the Artix-7’s capabilities and learn how to use it. The circuit board is “bare” in the sense that it doesn’t come with its own plastic case, but it is actually quite crowded with features, with connectors and hardware interfaces of various kinds, push-buttons, and a set of seven-segment LED numeric displays. Important to the MEGA65 project, the trainer board includes VGA video output, monaural audio output, a USB port for a PC keyboard, and a microSD card connector.
While the Nexys board is not an officially supported configuration, the MEGA65 team still provides downloads of the MEGA65 core for the Nexys A7. You can buy a Nexys board for $350 on Amazon, install the MEGA65 core, set up the microSD card, and put together a capable MEGA65 rig. This configuration lacks the eight megabyte RAM expansion of the MEGA65, but this is a documented variation, and many software titles can run without it.
Note that the Nexus A7 board is also known as the “Nexys4DDR,” which is the name you will see in some documentation. This is not the same as the older board known as the “Nexys 4,” which was also used for MEGA65 development at one point.
You can program the Artix-7 FPGA using the m65 command-line tool provided by the MEGA65 project, or with Vivado ML: Standard Edition, the free version of the official professional FPGA development suite from Xilinx. Connect your PC to the “PROG UART” microUSB port on the board.
Support for the USB host port is limited and doesn’t work with USB hubs. You can connect a standard USB PC keyboard to this port, though be warned that fancier keyboards tend to act like USB hubs, so be sure to look for something cheap. A PC keyboard does not have the MEGA65 key layout, but all of the MEGA65 keys are mapped to PC equivalents.
For serious tinkerers, you can enhance your Nexys board with the DM65PIC MEGA65 widget board, designed by Dieter Penner. The widget board connects to the Nexys’s PMOD ports and provides connectors for an authentic Commodore 64 keyboard, a Commodore 65 keyboard (if you’re lucky enough to have one), and two DE-9 ports for joysticks, paddles, or mice. You’ll have to get a board fabrication shop to make it from the Eagle design files, and depending on which shop you use you may need to solder some or all of the surface mount components. You’ll also have to program the microcontroller using the software in the repo. It’s a significant project, but can make for a satisfying build. See sy2002’s demo video to see the widget board in action.
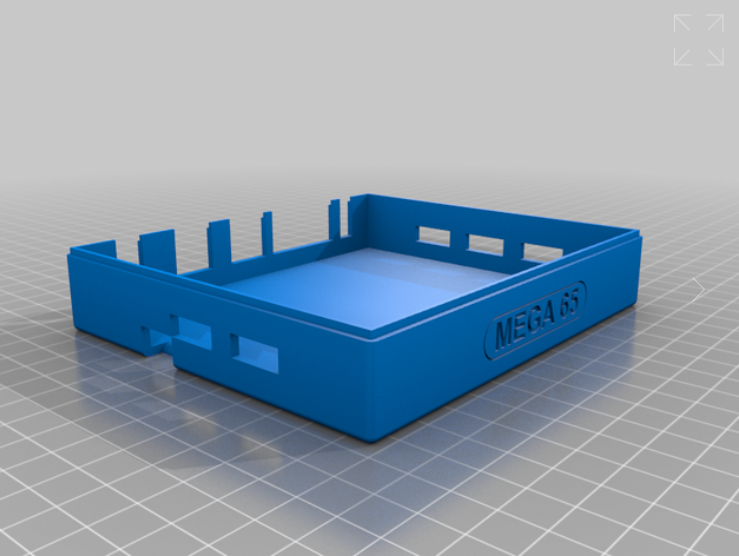
While you’re at it, whip up a 3D-printed case for the Nexys using community-provided design files. I don’t have my own 3D printer, so I use 3D printing services like ShapeWays. It’s pretty amazing how we can send homemade design files for things like plastic shapes and circuit boards to fabrication services, and have them in our hands weeks later, for not much money.
Because the Nexys board was the only way to develop for the MEGA65 project for so long, there are excellent set-up instructions in the Developer Guide. Also check out the article and video by RetroCombs: Install the MEGA65 on a Nexys4 or A7 FPGA (2021).
Board revisions
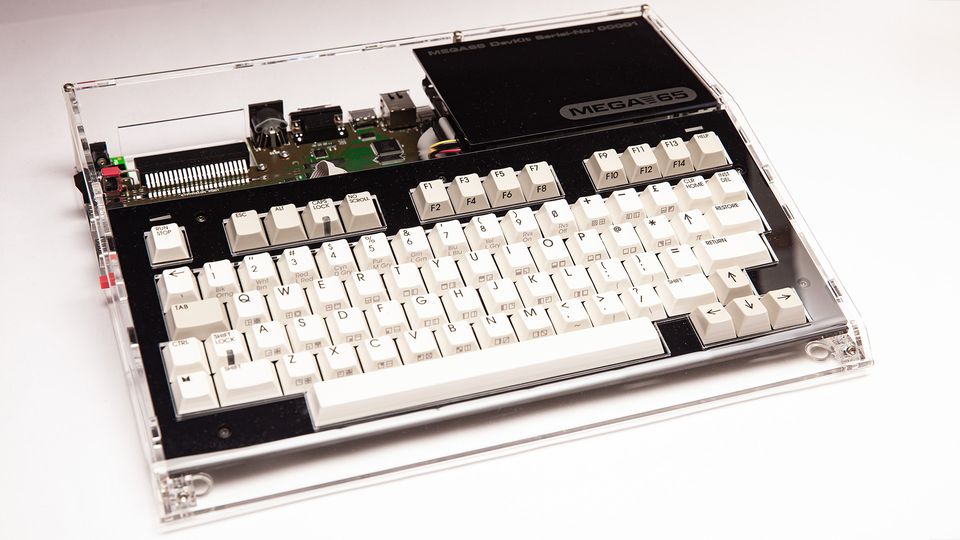
Between the Nexys trainer board and the MEGA65, there were two revisions of the main board. It is occasionally useful to understand the board revision identifiers, especially when locating the firmware release for your computer.
There were early main board designs known as “R1” and “R2.” These were not distributed, so you won’t see these in the wild.
In the year 2020, the MEGA65 project produced and sold 100 “DevKit” units, with cases made from laser cut acrylic. The DevKit main board is revision “R3.” It has four slots for firmware cores, and includes eight megabytes of additional RAM (known as “attic RAM” or “HyperRAM”). DevKits came bundled with USB JTAG hardware for testing new cores and doing cross-development of software. You can only flash a new core to slot 0 of a DevKit using the Vivado software.
The latest main board in today’s MEGA65 is known as revision “R3A.” The differences from the R3 board are minor: there are eight core slots instead of four, and there are some minor electrical changes. The R3A board can only be flashed by the m65 tool and not the Vivado software suite, but you can flash a new core to slot 0 without Vivado.
From an architecture standpoint, the Nexys, R2, R3, and R3A boards only differ with regards to the Attic RAM: whether it’s present or absent, how much there is, and how fast it performs. The core and system software intend to continue supporting these differences, and software that uses Attic RAM can test for its presence to run cleanly on all boards.
You’ll see these board revision identifiers in the names of the different versions of the MEGA65 Core Release Package on Filehost:
nexys4ddr-widgetis the latest firmware for Nexys boards, with widget board support.mega65r2is for the unreleased R2 board.mega65r3is for the DevKit (R3) and retail (R3A) MEGA65. You probably want this one.
Peripherals
The MEGA65 tries to be compatible with some vintage Commodore peripherals and their modern counterparts. Here’s a quick rundown of a few that I’ve tried. If you have your own experiences or recommendations, be sure to post them to the #peripherals channel in the Discord.
Joysticks, gamepads, and paddles
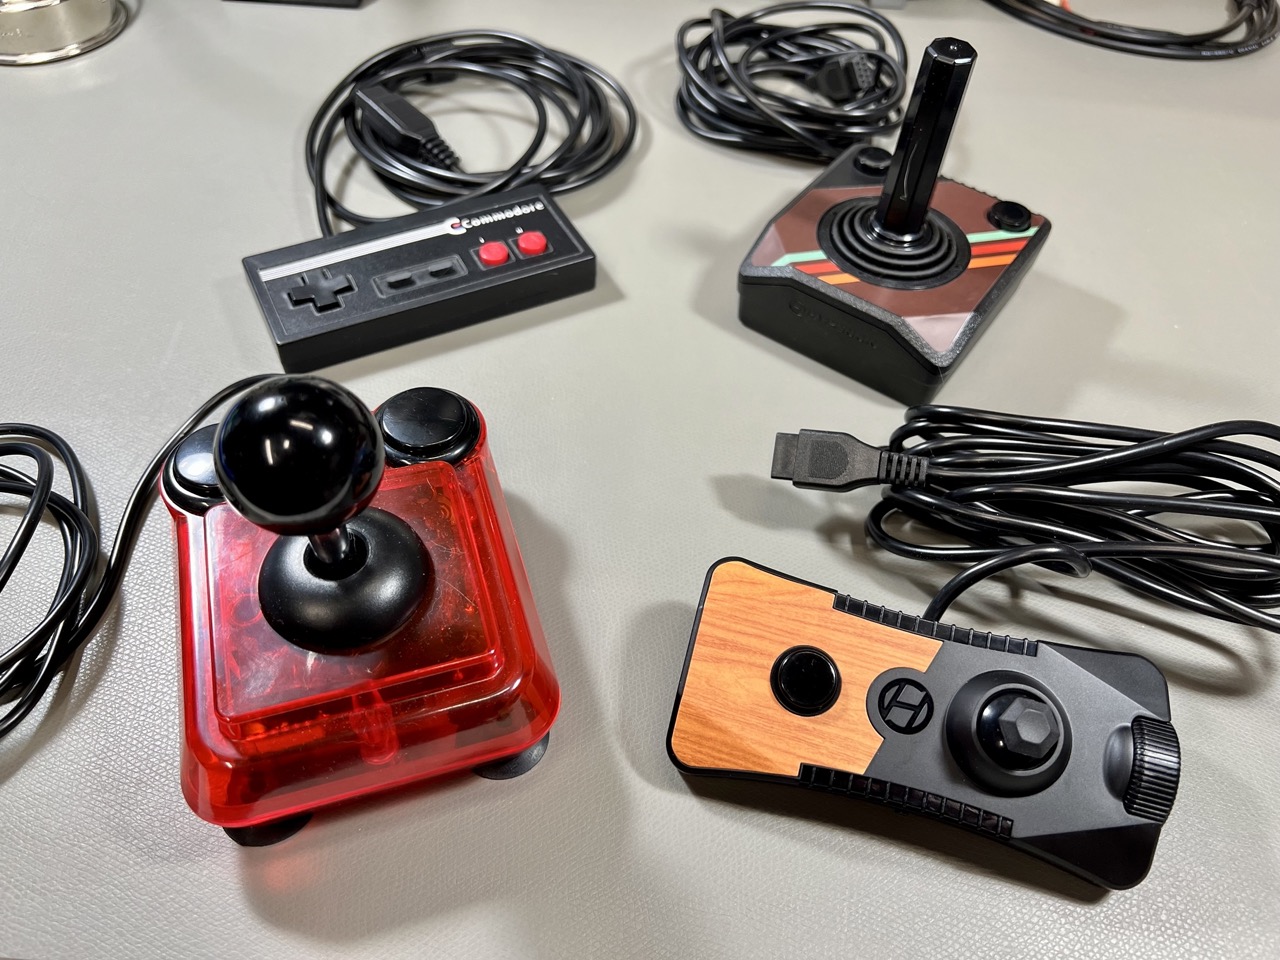
Vintage joysticks meant for Commodore and Atari computers work well with the MEGA65. They connect to the DE-9 ports on the left side of the computer.
If you’d like to use a Sega Genesis gamepad controller, be sure to use a C64 Genesis adapter. Sega Genesis controllers use DE-9 connectors, but use different wiring that can damage a Commodore. It’s not obvious how much damage it might do to a MEGA65, but it’s mis-wired regardless and I’m not willing to try it to find out.
I prefer a modern gamepad controller wired for the C64. They look and feel like Nintendo controllers, and they wire the second button to “up,” which is used to jump in platform games.
For a modern joystick, I like the ArcadeR. It puts an arcade-quality stick and buttons in a featureful, mod-able case, and has options like auto-fire and two-button support. Another option is the Hyperkin Trooper, a good choice if you’re looking for the vintage shape without roughing up vintage equipment.
The Hyperkin Ranger has a gamepad form factor, and also includes a single wheel for paddle games. Specifically for paddles, I recommend looking for vintage Atari paddles on eBay. They appear to be plentiful, inexpensive, and in good condition, at least for now.
Mice
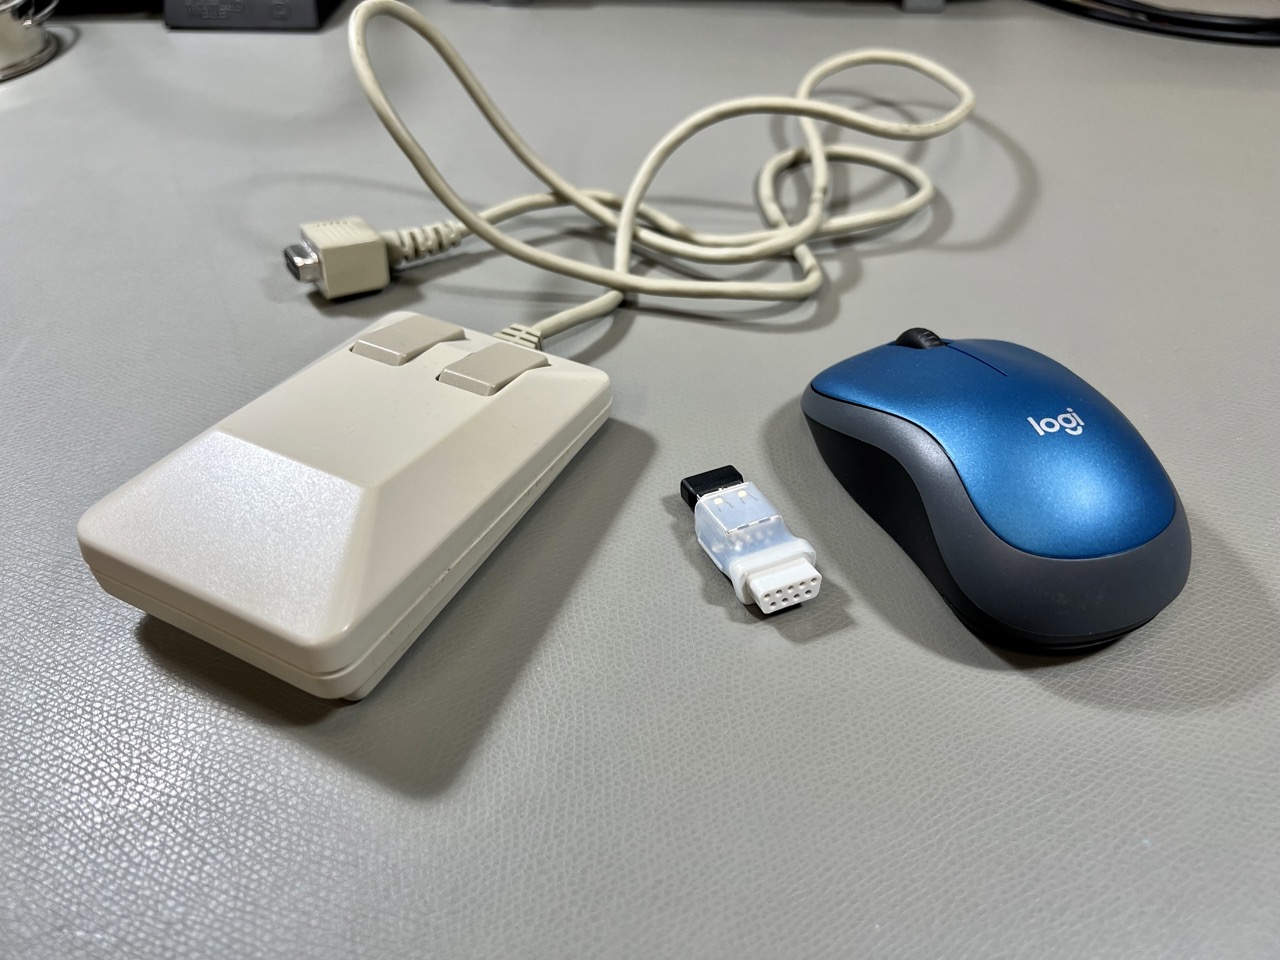
The MEGA65 supports the Commodore 1351 mouse, the Amiga mouse, and anything that can act like either of these. The 1351 tends to be more reliable.
The MEGA65 must be configured to recognize either the 1351 or the Amiga mouse. Hold the Alt key while turning on your MEGA65 to start the Configuration tool, then set each port to the desired mouse type under the “Input” tab. Connecting an Amiga mouse while in 1351 mode may interfere with the behavior of the keyboard, so if you’re having difficulty, just unplug the mouse and check your settings.
The mouSTer is a clever modern device that lets you connect a USB mouse to a DE-9 Commodore port. It’s quite versatile, and you can set a variety of options by connecting a USB drive containing a config file. The mouSTer can be configured to emulate either a 1351 or an Amiga mouse, so make sure it matches your MEGA65’s settings. I use my mouSTer with an inexpensive Logitech M185 wireless mouse. If I’m not desperate for the Commodore tank mouse look and feel, I prefer my Logitech.
I’m looking forward to trying modern retro mice recreations like the Tank Mouse when I get one.
Other peripherals
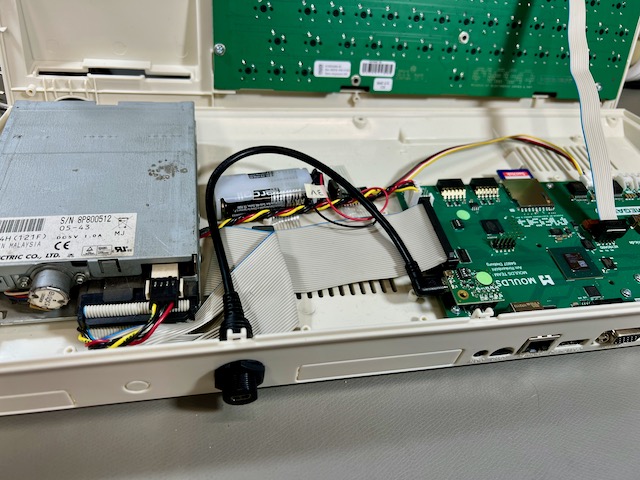
The MEGA65 has an IEC serial port, most often used on Commodores with external disk drives. You can use a vintage external 1581 drive with the MEGA65 in C65 mode. Other IEC devices don’t work so well with C65 mode at the moment due to known timing issues inherited from the Commodore 65 ROM. C64 mode (type GO64) does better in some cases. I was able to get my Blue Chip D12 daisy wheel serial printer to work in C64 mode. Improving IEC device support in C65 mode is on the to-do list for the ROM.
The FTDI JTAG adapter is a peripheral that mounts to the primary JTAG port on the main board. With your PC connected to it with a mini-USB cable, you can install bitstreams, send programs, transfer files, and debug issues. If you don’t need to install bitstreams, you can use a cheaper and easier-to-find USB serial device connected to the UART pins of the JTAG connector. USB serial communication is great for cross-development and debugging.
Work is in progress to make it possible to transfer files and programs, and perform other cross-development tasks like debugging, using the MEGA65’s ethernet port, with no need for a separate adapter. If you’re interested in helping test this feature, inquire on the Discord. There’s a test core and new versions of the command-line tools that demonstrate this capability.
To round out this discussion of peripherals, we might as well mention the Real-Time Clock replacement. This is a peripheral that uses the Grove connector on the main board. The replacement RTC was our workaround solution for the small percentage MEGA65s that shipped with faulty real-time clock chips. The latest firmware detects when the replacement RTC is connected and communicates with it over the Grove connector.
Paul’s prototypes
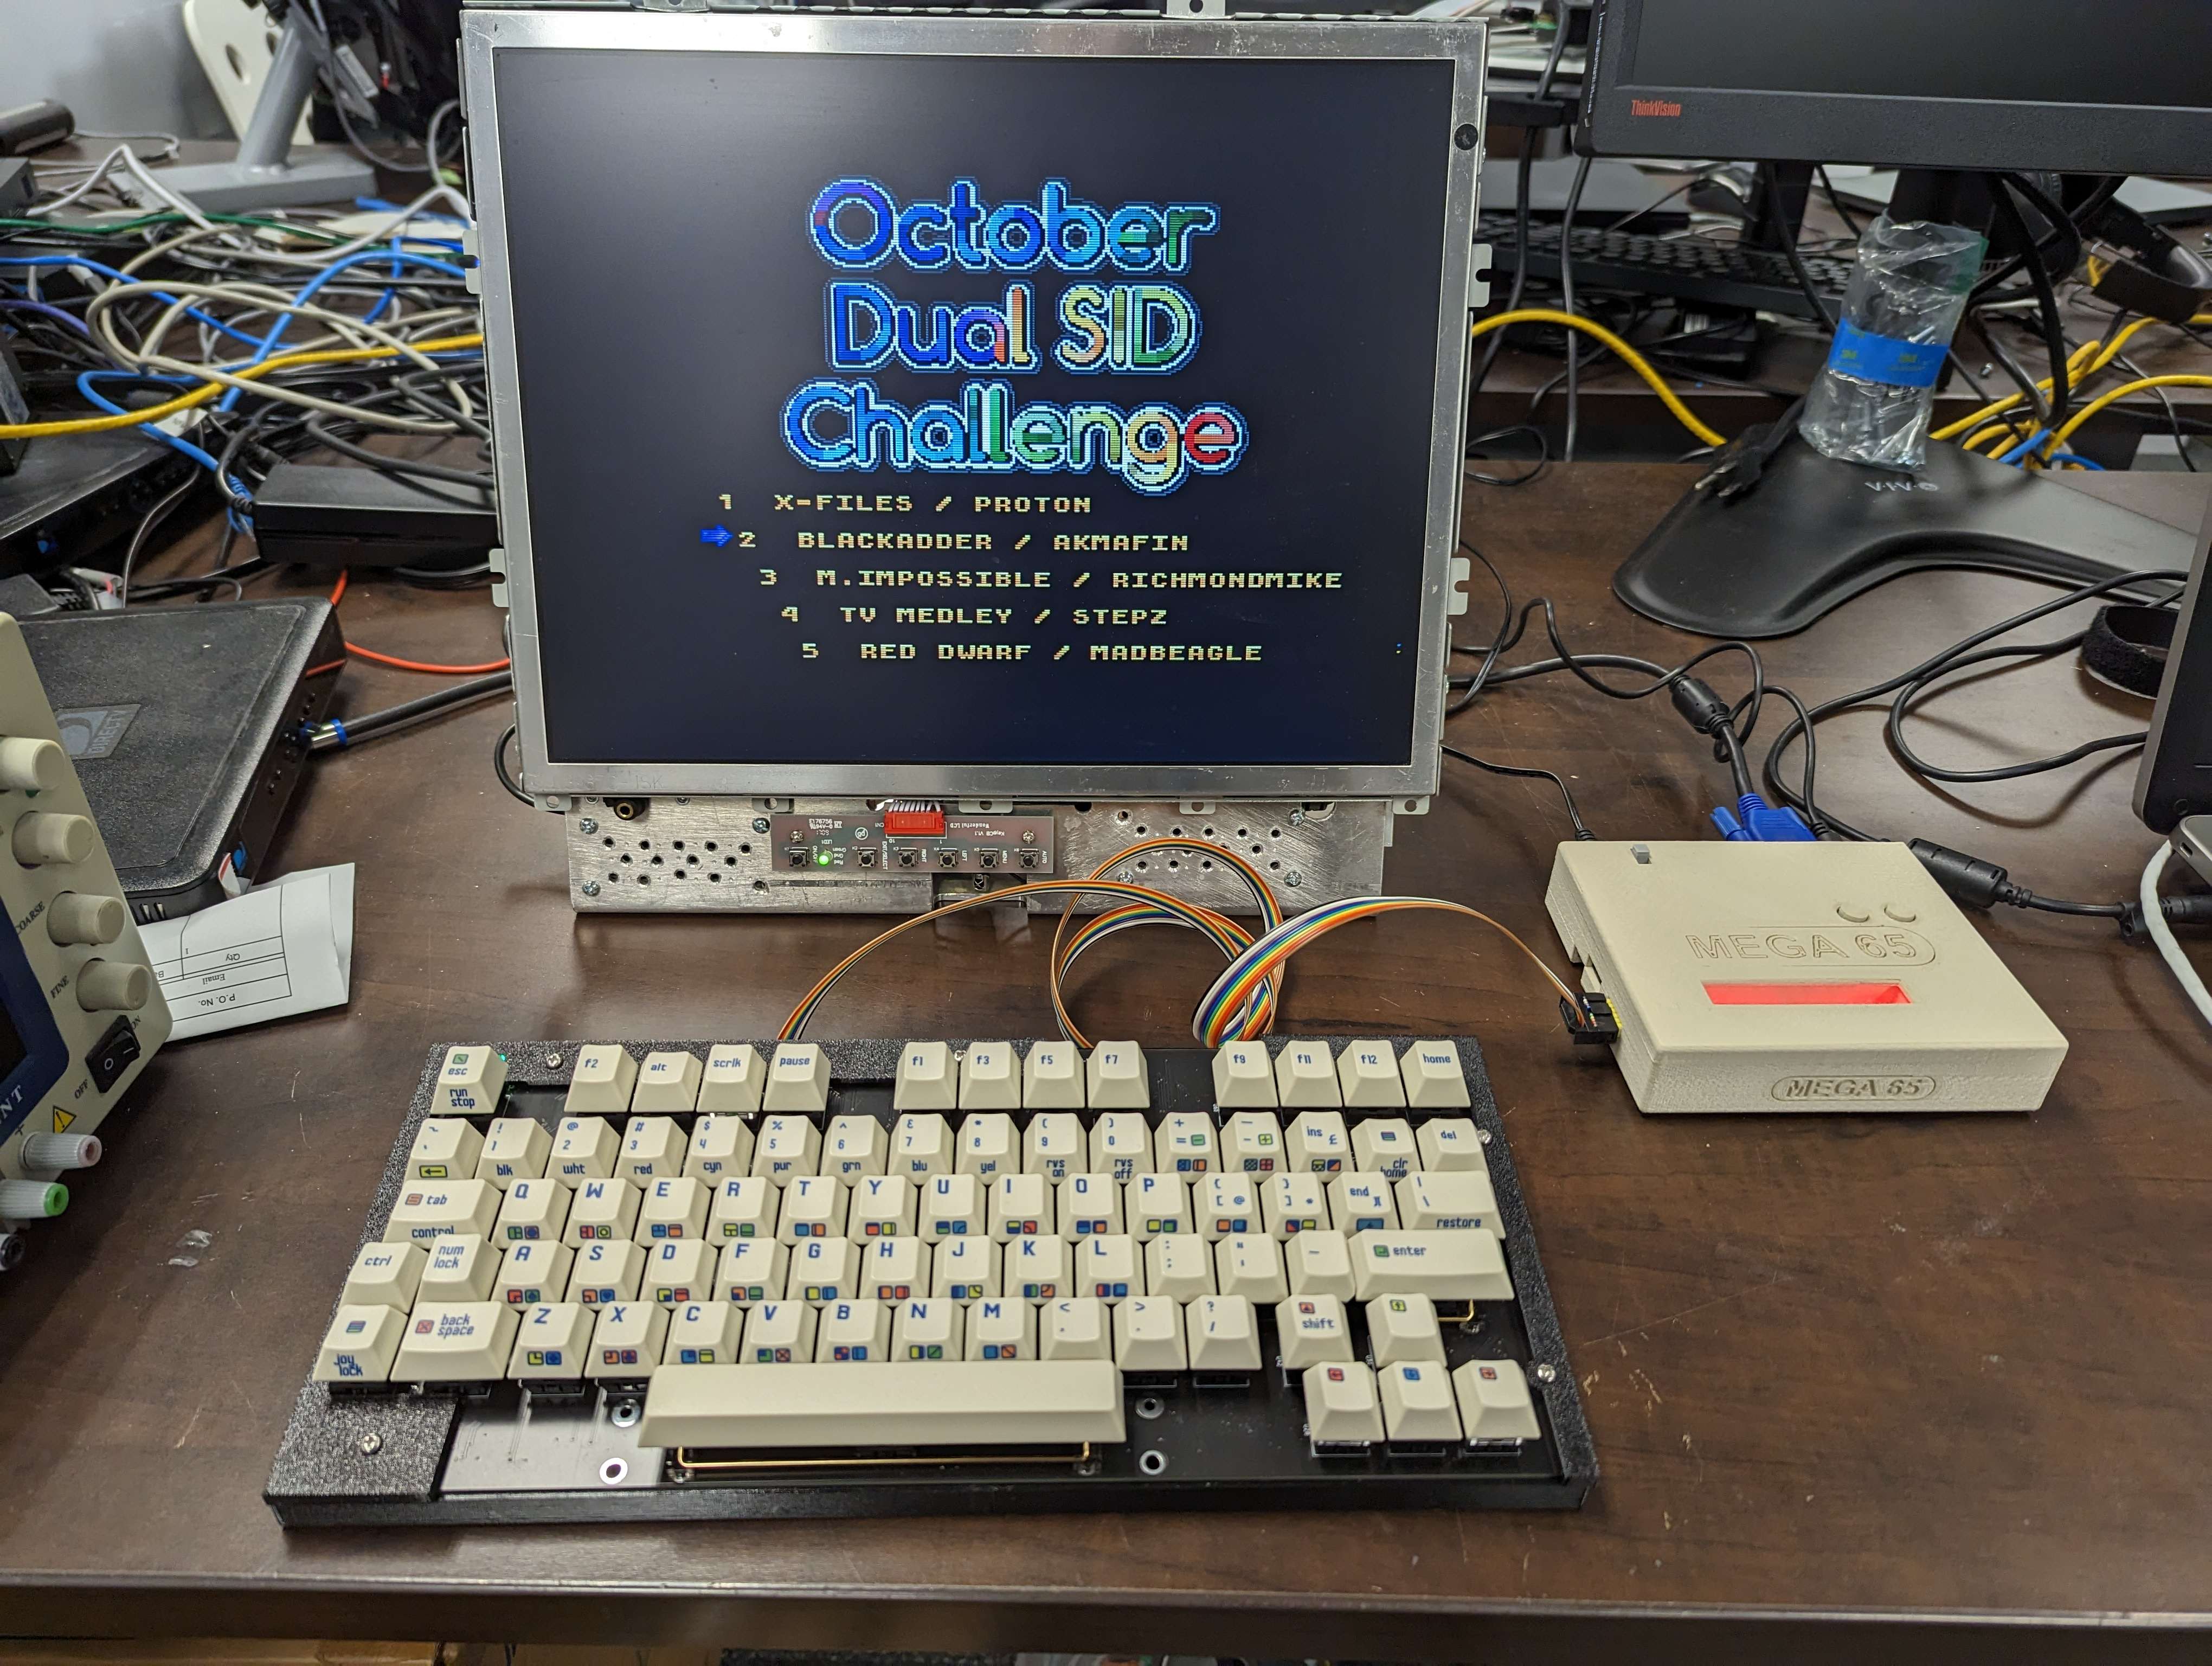
One of the biggest hardware challenges for the MEGA65 project is the limited availability of FPGA chips. Trenz Electronic can only acquire so many of the FPGAs at time, which limits their ability to build and deliver computers. Even the price of a Nexys trainer board has gone up $80 in the last year. We all hope this shortage is temporary, but it may be a few years before we see supply return to previous levels.
MEGA65 founder and hardware designer Paul Gardner-Stephen is experimenting with a prototype for a lower cost keyboard that doesn’t need its own FPGA. The “DIY keyboard” project intends to be a drop-in replacement for the current MEGA65 keyboard, using the same Cherry MX switches and keycaps, and fitting perfectly in its case with no noticeable difference to the user. It can also be a standalone C65 keyboard for the Nexys board, connected to a PMOD port. You can use the open hardware design files to send away for a bare board, and install your own switches and keycaps. As pictured above, MEGA65 owner mpryon completed his Nexys rig with a DIY keyboard based on Paul’s prototype design.
It’s too early to say whether the DIY keyboard will become a more polished product for sale. It’s easy to imagine it being sold as a kit with a set of official MEGA65 keycaps, or adapted via microcontroller to be a USB keyboard with a C65 layout for use with the Xemu emulator. You can follow Paul’s progress on the DIY keyboard on his developer blog: October 2022, November 2022, December 2022
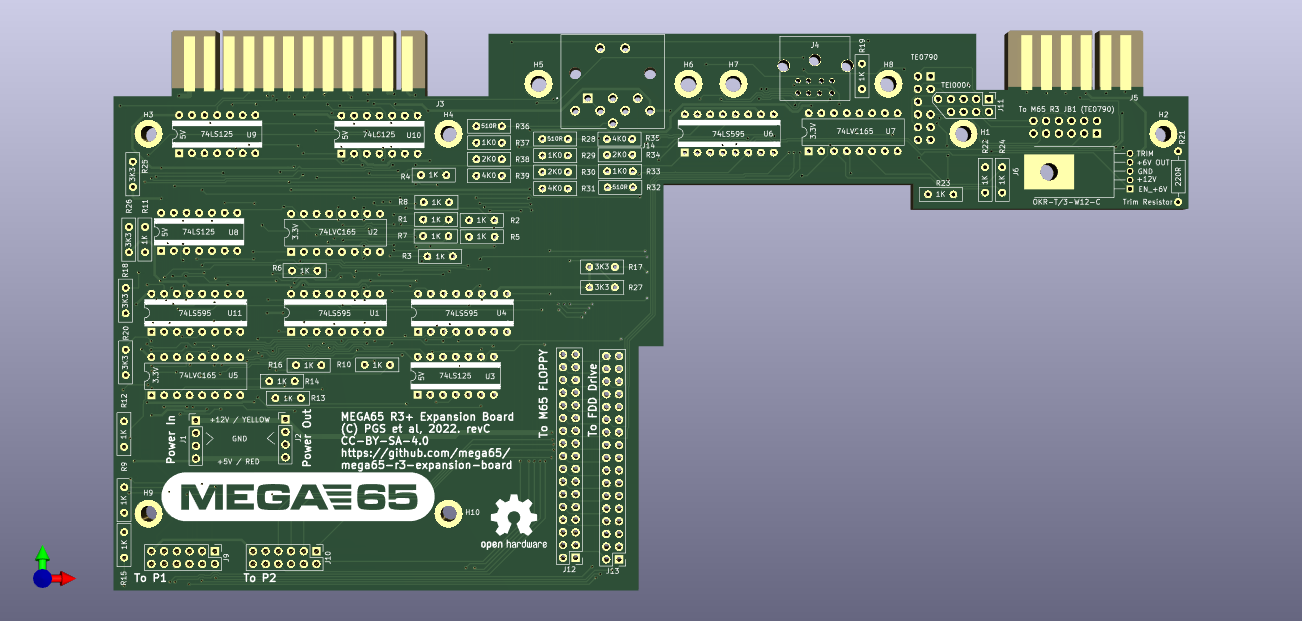
Paul is also working on a prototype for a port expansion board that adds component video output, a Commodore user port, a tape port, and a port for the unreleased C1565 external floppy disk drive. The board would mount inside the MEGA65, and place the new ports through the punch-outs already prepared in the back of the plastic case.
Why add a port for an unreleased Commodore peripheral? So you can recreate the peripheral, of course! It’s just an idea for now, but the 8-pin mini-DIN connector for the C1565 external floppy drive could support an actual vintage prototype drive, or an all-new project to recreate the drive with a case that matches the MEGA65. At the very least, the port would make the MEGA65 more authentic, matching the similar port on the Commodore 65.
As with the DIY keyboard, there are not yet plans to produce the expansion board in quantity. You may be able to make your own from open designs at some point. Paul is also dev-blogging progress on the expansion board: October 2022, January 1, 2023, January 6, 2023.
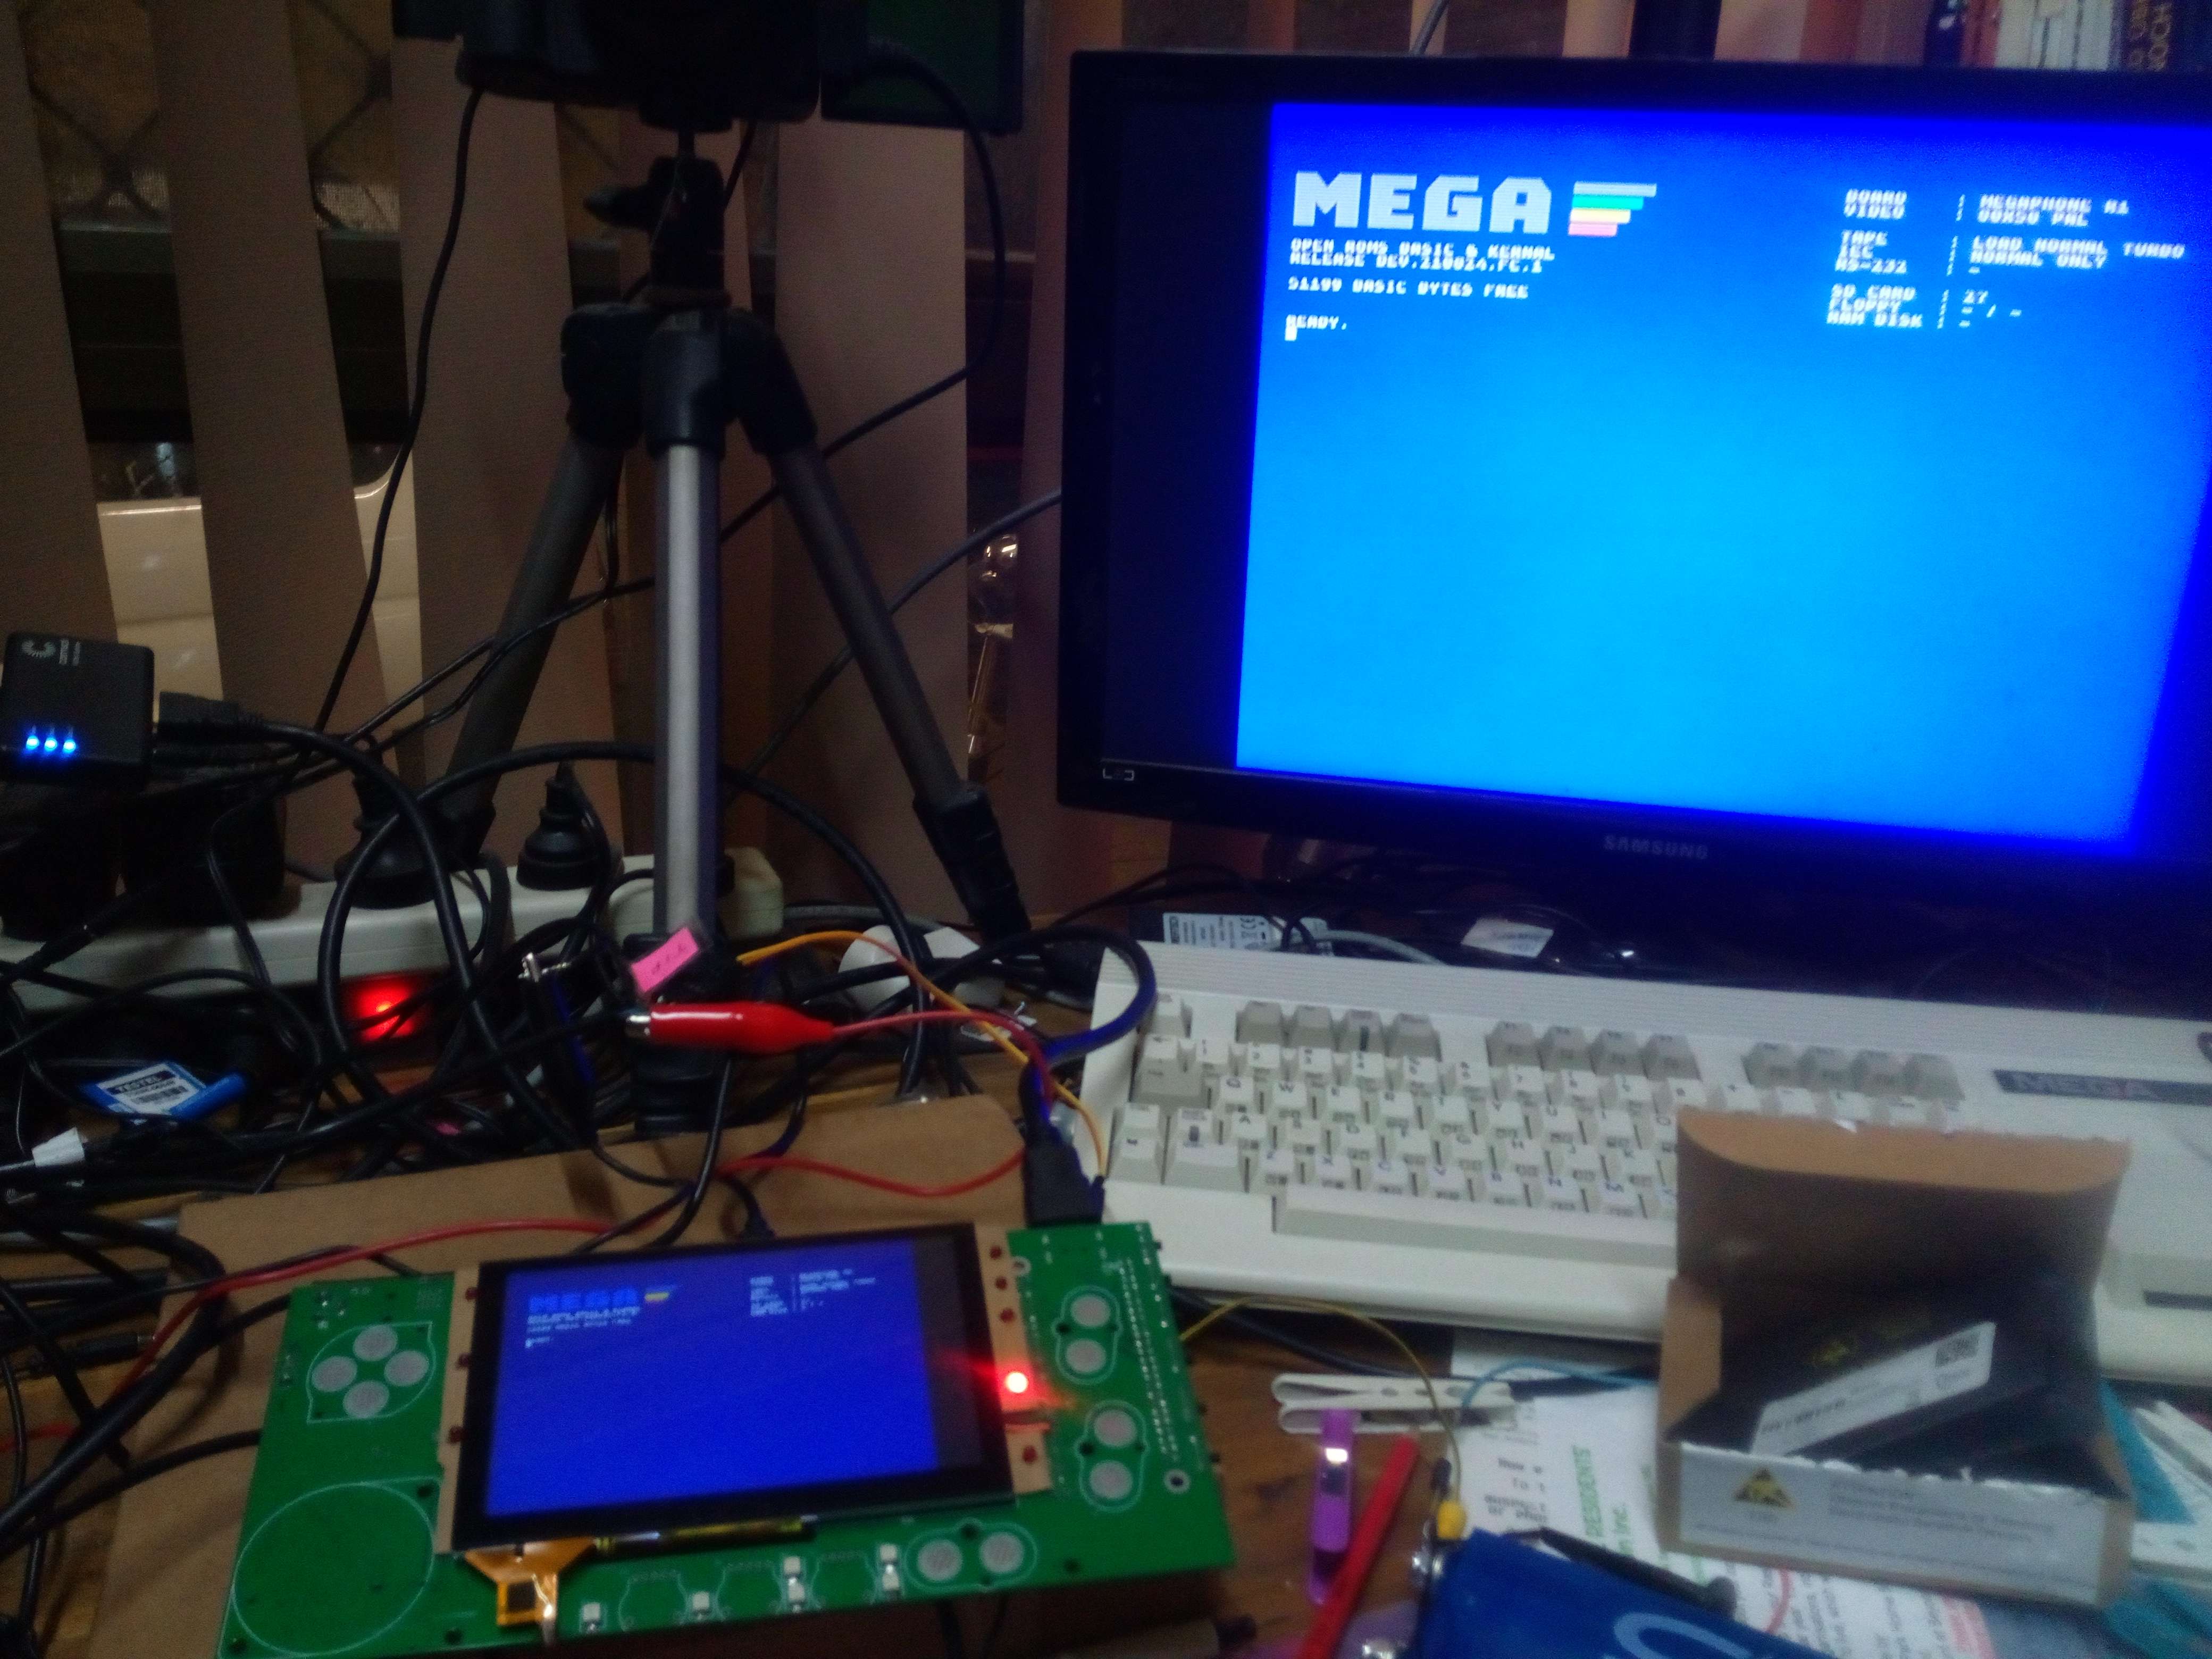
For several years, the MEGA65 website advertised not only an upcoming reproduction of the Commodore 65, but also a mobile phone based on the same technology. Today, the website focuses on the first project, which, obviously, is now in full swing and in the hands of hundreds of happy owners. Is the mobile phone project still a thing?
Let this be a lesson: never bet against a project with strong principles. The MEGAphone is still in active development, and making good progress. With a grant from the NLNet Foundation, the MEGAphone seeks to reclaim one of the most important technological spaces in the daily lives of billions of people.
The idea is this: The sheer complexity of modern computers alienates us from the technology upon which our digital lives depend. It’s not enough for a smartphone operating system to be open source in theory, as Android claims to be. To achieve the benefits of this transparency—security, privacy, control in the hands of the user—the technology has to be strictly modular, and simple enough for a computer hobbyist to understand. The Commodore 65 is one of the last practical computers to fit this description. What if there were a smartphone based on the Commodore 65?
The MEGAphone is a proof-of-concept portable device with mobile telephony, Internet, and a touch screen interface. It uses the MEGA65 core and ROM, and can run MEGA65 software, including software written by the phone’s owner. Everything is open source, and any owner can replace any component on their phone as easily as they can on the MEGA65.
To learn more about the project’s goals, watch video of Paul’s 2019 talk, Creating Resilient and Sustainable Mobile Phones. For a glimpse of recent progress, see his recent dev-blog entries about the MEGAphone: September 7, 2022, September 14, 2022, September 20, 2022.
The MEGA65 hardware released in 2022 is a huge milestone for the project and for vintage computer preservation in general, the culmination of nine years of work to realize the vision of Commodore’s designers and engineers with modern components and techniques. The result is a multi-layered hobbyist platform that will continue to see revisions, adaptations, and expansions into the future.
If you’d like more information on any of these projects, or if you discover something interesting or build something cool, be sure to let the community know in the Discord.
Until next time!
— Dan