Fun with PETSCII!
Fun with PETSCII! Dan’s MEGA65 Digest for April 2023.
PETSCII is a set of 256 values that can be printed to the screen of a Commodore computer. Most of these codes refer to characters, such as letters, numbers, punctuation, and Commodore’s unique set of graphics glyphs that can be typed from the keyboard. Other codes are control codes that manipulate the state of the screen and printing system, such as to change the color of subsequently printed text. The PETSCII character set is part of what gives Commodore computers their distinctive style. Drawing pictures by typing PETSCII characters and codes is one of the first things everyone does with a Commodore, and there is a long tradition of crafting murals of PETSCII art for demos, games, and computer bulletin boards.
If you’re reading this, you’re probably pretty familiar with the capabilities of PETSCII on a Commodore 64. In this Digest, we’ll review the PETSCII character set, and see how the MEGA65 can learn a trick or two from Commodores that predate the 64. We’ll also take a look at PETSCII control codes that are newer than the C64, and see how we can make special use of PETSCII strings on the MEGA65.
Featured Files
Here’s more stuff you can download and try on your MEGA65 today!
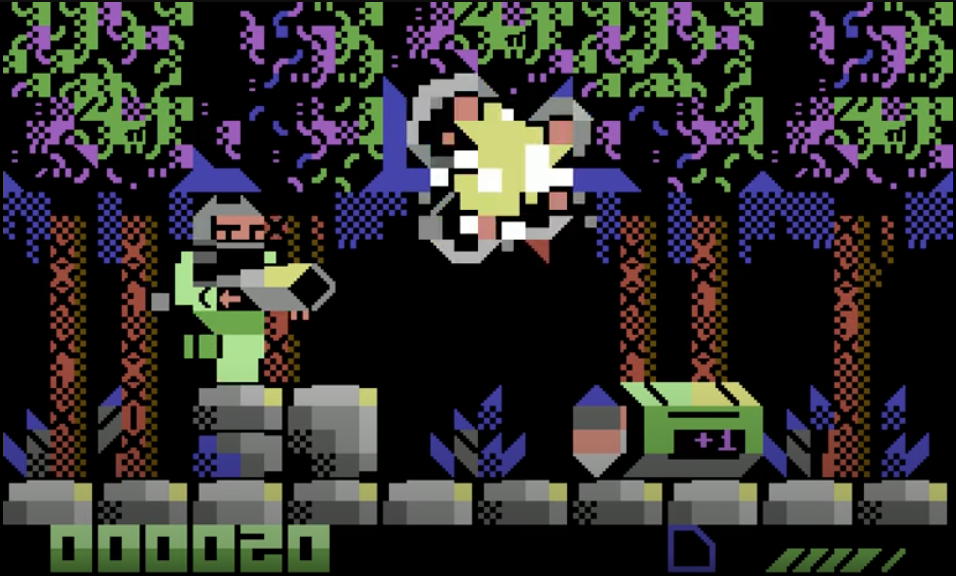
M3wP Solitaire, by M3wP.
M3wP Solitaire by M3wP. Every computer needs some card game fun, and this Solitaire game has it in spades! Connect a mouse to port 1 and play the classic Klondike Solitaire with rich multi-color playing card graphics. You won’t be able to resist just one more hand.
Don’t have a vintage Commodore 1351 mouse or Amiga mouse? Get the mouSTer adapter and connect a modern USB mouse. Make sure the mouse mode is set correctly in the MEGA65 Configuration menu (hold Alt while turning on the computer, then select 1) to match the mouSTer configuration. If you’re one of the lucky ones to receive a modern Amiga Tank Mouse from their Kickstarter campaign, that also works with the MEGA65.
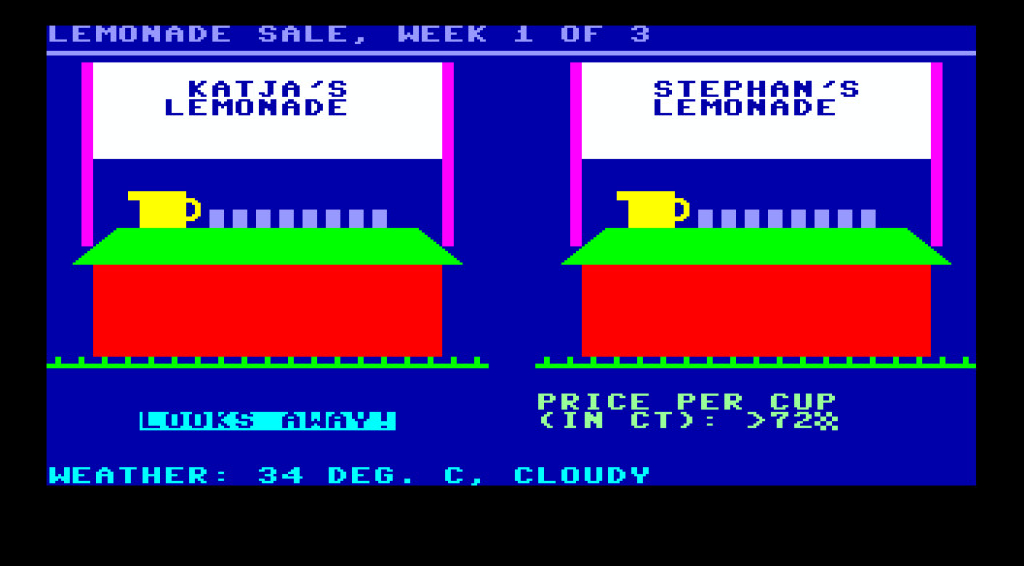
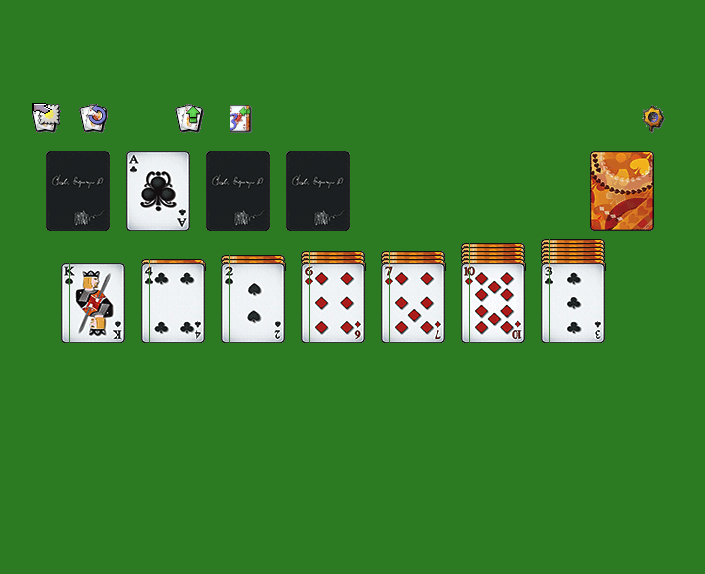
Lemonade for two, by ubik.
Lemonade for two by ubik. An innovative two-player version of the microcomputer classic business strategy game. Use your limited funds to buy supplies based on the weather forecast, sell lemonade in your neighborhood, and leverage your profits into expanding your business. Out-match your opponent and win it all!
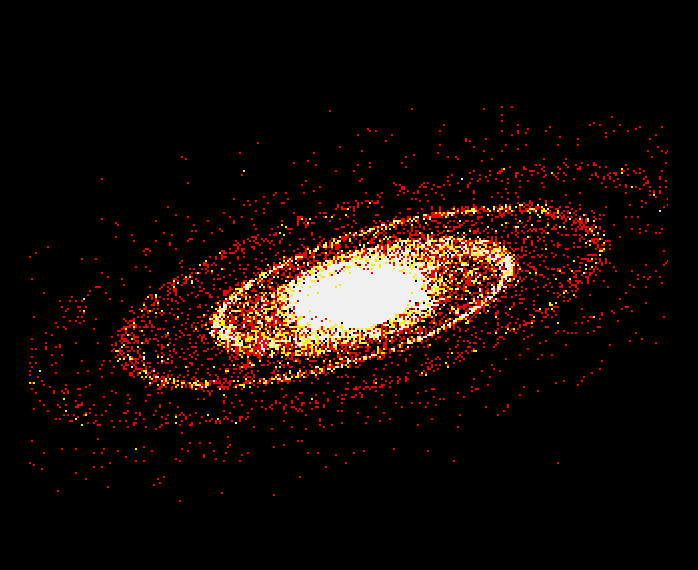
Procedurally Drawn Galaxy, by grim_fandango.
Procedurally Drawn Galaxy by grim_fandango. This high resolution graphics demo renders a gorgeous spiral galaxy. Once you’ve admired the image, check out the BASIC program listing to see how it’s done.
The lost glyphs of the PET
The PETSCII text encoding standard was originally invented for the Commodore PET computer in 1977. It uses 8-bit code points for 256 possible values, of which 192 represent typeable characters. Some characters are assigned to multiple code points; the actual number of distinct typeable characters is 128. The remaining 64 code points are used for control codes, or otherwise have no effect when printed to the screen.
While PETSCII was based on the ASCII code standard in use by most computers by that time, the Commodore PET had its own ideas about how to make the best use of the code space. An unexpanded PET did not have a bitmap graphics mode, so PETSCII extended the character set with graphics symbols that could be used to draw boxes, diagrams, and game images. PETSCII actually describes two character sets: one with mixed case letters and some graphics symbols (the “text” character set), and another with only uppercase letters and more graphics symbols (the “graphics” character set). On Commodore machines, the graphics character set is the default. This is why you sometimes see ASCII messages mis-printed on Commodore machines with lowercase letters as uppercase and uppercase letters as graphics symbols. The user can toggle between character sets as needed by pressing the Commodore key and the Shift key together. (This is Mega + Shift on the MEGA65.)
The PETSCII codes for the 128 typeable characters map to screen codes that describe what actually appears on a location on the screen. There’s a second set of screen codes that represent those characters in reverse video mode, for a total of 256 possible screen codes in a character set. With two character sets, the complete definition of a Commodore typeface has 512 possible glyphs, of which only the first 256 or second 256 can be on the screen at one time.
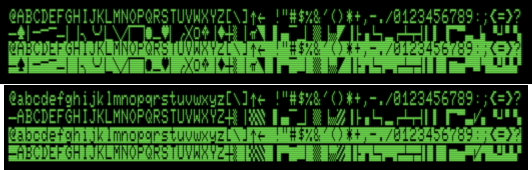
Fun fact: The PET adds a one-pixel vertical space between each line when the display switches to “text” mode, to give it more of an ASCII terminal feel. You can see this in the image above, which I produced in an emulator with a program that prints the PETSCII control code to switch to this mode. (It’s also possible to use the text character set on a PET without the vertical gaps.)
The C64 typeface
The original Commodore PET typeface was designed with the PET’s built-in monochrome display in mind. These glyphs were used in 40-column and 80-column PET models. The same glyphs were also used in the VIC-20. To reduce costs, the VIC-20 did not have a built-in display and was designed to be connected to the color television set already in your living room. To make the text legible on blurry TVs, the VIC-20 only supported 22 columns of text and stretched the PET glyphs extra wide.
Commodore sought to return to a 40-column text display for the Commodore 64, but there was a problem: the PET glyphs were too thin and spindly to be readable on a TV at narrow character widths. So Commodore redesigned the character set with thicker vertical lines. Nearly every occurrence of a single pixel with space on either side was doubled in some form.
The result is the Commodore typeface we know and love, used unchanged all the way up to the MEGA65. It looks pretty great in 80 columns on a modern display.
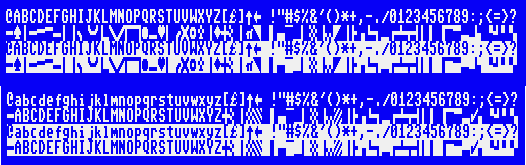
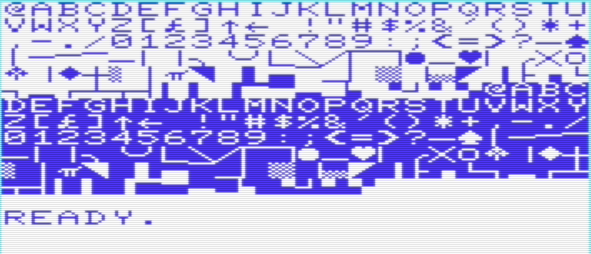
The missing glyphs
The redesign met its goal, but at a cost. Several PET glyphs simply did not survive being made thicker.
For example, the glyph set includes vertical lines of every width on both the left and right side of the tile. Take a look at your MEGA65 keyboard and you can see a few of these are typeable by holding down Mega and pressing keys like L, N, and M. On the PET, CBM+G and CBM+M were vertical lines one pixel wide. Starting with the C64, they are now two pixels wide, redundant with CBM+H and CBM+N, respectively.
Some PET glyphs have been deleted entirely. A fine-grained 1-pixel checkerboard pattern was replaced with a duplicate of the 2-pixel checkerboard pattern. Dotted and line pattern glyphs just became extra empty spaces.
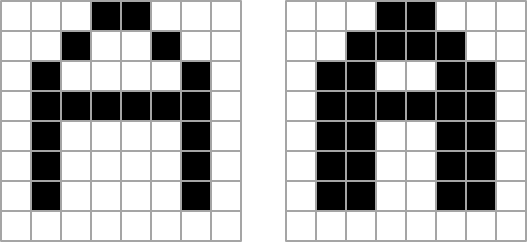
Early MEGA65 contributor Markus Neeb (X2themax on the Discord, aka MPBBS) noticed the missing glyphs. At the MEGA eV open house of August 2022, he proposed a radical idea: restore the missing PET glyphs for the MEGA65. All of the restorations only replace glyphs that are redundant with others elsewhere in the typeface, and because they are both redundant and obscure, they likely haven’t even been used by MEGA65 software. The restored glyphs are authentic to Commodore history, and are demonstrably useful on modern displays in both 40-column and 80-column modes.
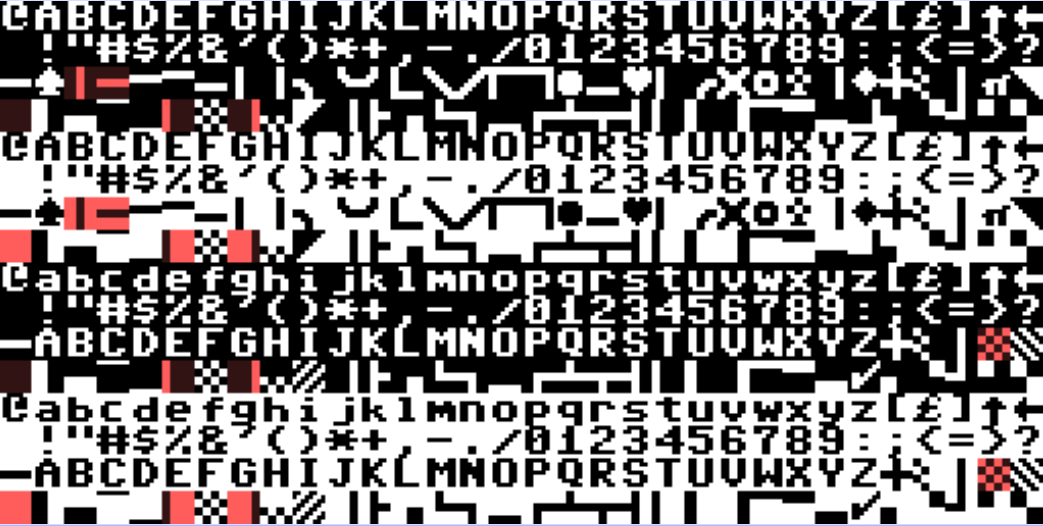
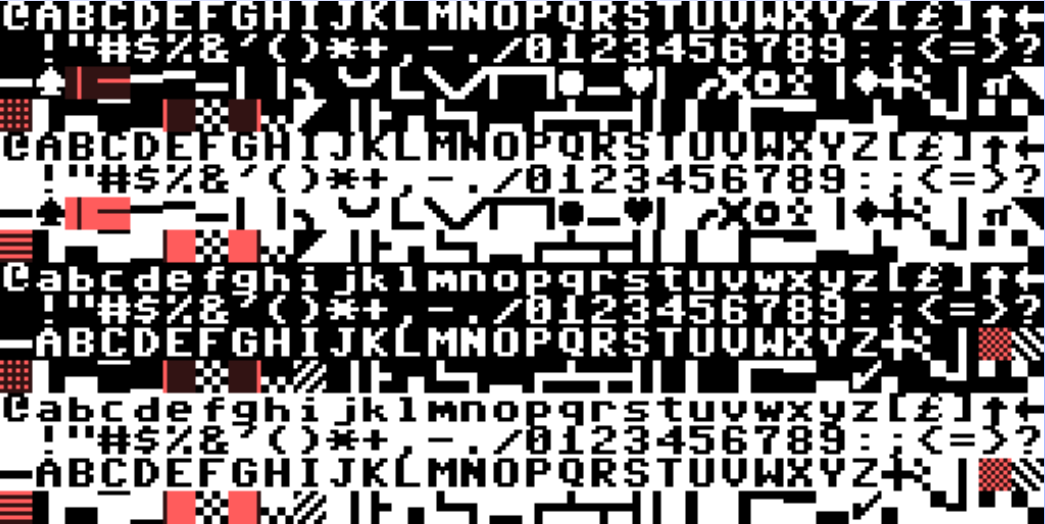
It’s intriguing to imagine how re-introducing these glyphs enhances the character of the platform. I know I would have used the fine checker, dotted, and lined pattern tiles all the time if I had them—and a sharp enough display to support them—back in the day.
The MEGA65 Steering Committee decided against modifying the default ROM with these changes, primarily because it’s actually quite easy for any program that wants to use these glyphs to install them. It’s even easier on the MEGA65 than on previous Commodore computers. BASIC programs can just use the CHARDEF command, and machine code programs merely have to write the new glyphs to a memory location.
The following are CHARDEF statements that restore the missing PET glyphs. Feel free to use them in your programs, or in your AUTOBOOT.C65 file.
10 chardef $42,$10,$10,$10,$10,$10,$10,$10,$10
11 chardef $43,$00,$00,$00,$ff,$00,$00,$00,$00
12 chardef $60,$aa,$00,$aa,$00,$aa,$00,$aa,$00
13 chardef $65,$80,$80,$80,$80,$80,$80,$80,$80
14 chardef $67,$01,$01,$01,$01,$01,$01,$01,$01
15 chardef $c2,$ef,$ef,$ef,$ef,$ef,$ef,$ef,$ef
16 chardef $c3,$ff,$ff,$ff,$00,$ff,$ff,$ff,$ff
17 chardef $e0,$ff,$00,$ff,$00,$ff,$00,$ff,$00
18 chardef $e5,$7f,$7f,$7f,$7f,$7f,$7f,$7f,$7f
19 chardef $e7,$fe,$fe,$fe,$fe,$fe,$fe,$fe,$fe
20 chardef $15e,$aa,$55,$aa,$55,$aa,$55,$aa,$55
21 chardef $160,$aa,$00,$aa,$00,$aa,$00,$aa,$00
22 chardef $165,$80,$80,$80,$80,$80,$80,$80,$80
23 chardef $167,$01,$01,$01,$01,$01,$01,$01,$01
24 chardef $1de,$55,$aa,$55,$aa,$55,$aa,$55,$aa
25 chardef $1e0,$ff,$00,$ff,$00,$ff,$00,$ff,$00
26 chardef $1e5,$7f,$7f,$7f,$7f,$7f,$7f,$7f,$7f
27 chardef $1e7,$fe,$fe,$fe,$fe,$fe,$fe,$fe,$fe
PETSCII control codes
The ASCII standard includes codes that do something other than print a character when sent to a terminal or teletype. These codes cause the terminal device to perform some other action, such as to move the cursor (or print head) to the beginning of the next line, or signal the operator by ringing a bell.
PETSCII also includes non-printing code points that, when printed, perform an effect, such as:
- Change the color or style of subsequently printed characters
- Move the cursor position (potentially scrolling the terminal-like text display)
- Switch the display between the uppercase and lowercase character sets
- Enable or disable the ability for the user to switch between the uppercase and lowercase character sets
- Clear the screen
- Ring the terminal bell
Control codes can be typed directly into the screen using a key sequence. This is a great way to experiment with control codes and see their effects immediately. For example, hold Ctrl and press 3 to change the printing color to red. Ctrl + 2 changes it back to white. Printing is very similar to typing in this way: it causes the effect of typing each code to occur, in the order the codes appear in the string.
Your User’s Guide has a good reference of PETSCII character and control codes, and their keyboard equivalents, in Appendix B.
Including control codes in strings
The CHR$() function takes a PETSCII code as a number and evaluates to a one-character string for that code. You can concatenate this string with other strings.
PRINT "IT'S "+CHR$(28)+"VERY"+CHR$(5)+" COOL"
The CHR$() function works for all 256 PETSCII codes, but it’s not especially convenient: you have to use a table to look up the control code numbers, and type quite a few characters to spell it all out.
Thankfully, the Commodore screen editor has an alternate way to type control codes into strings just by typing the key sequences that cause their effect. The screen editor knows that you intend to include the code in the string, and not have it take effect immediately, when it is in quote mode. The editor enables quote mode when you type the first double-quote (") character of a string, and disables it when you type the closing double-quote character.
You may have seen vintage magazine program listings represent these typeable codes using labels, like so:
PRINT "IT'S {red}VERY{white} COOL"
Try typing this command, entering Ctrl+3 for {red} and Ctrl+2 for {white}. They appear as reversed characters inside the string.

Quote mode takes some getting used to. It’s easy to forget that cursor movement keys get quoted, so if you try to cursor left while typing a string, it quotes the cursor-left PETSCII codes instead. A few codes intentionally do not get quoted, such as pressing Return. If you need such a code in a string, the only way is to use the CHR$() function (CHR$(13) for Return).
There is one other way to access quote mode. When you press Shift+INST/DEL, the editor inserts a space at the cursor location and does not move the cursor. It also enters quote mode only for the inserted spaces, so you can type a control code if you need to. This quote mode effect happens even if the cursor is not located inside double-quotes! That’s not particularly useful, but it’s a tradeoff for the fact that the screen editor doesn’t try to understand what you are typing until you press Return.
If you find that you’re in quote mode and you don’t want to be, press Esc then O (the letter O).
It’s useful to know that the screen editor will interpret whatever is on the screen when you press Return, including reversed characters inside double-quotes, no matter how those characters were typed. Technically, you can type a quoted {red} code while not in quote mode by turning on reverse mode and typing the £ (pound) symbol, which is what it would look like if you typed Ctrl+3 while in quote mode. I’ve never done this in regular practice—I typically use the insert method to type quoted codes when modifying an existing line—but it’s fun to know that it works.
Try this:
- Type:
PRINT " HELLO{wht}", without pressing Return. - Cursor back to the space before
HELLO. - Enter Ctrl+9 to enter reverse mode, then type £.
- Press Return.
Print modes and colors
The Commodore 65 supports text modes for underlining, flashing text, and reverse text. These modes can be combined.
To enable underlining, press Ctrl+B. To enable flashing text, press Ctrl+O. One way to enable reverse text is Ctrl+R, though as we just saw, this is also available as Ctrl+9 aka “Rvs on.” There are PETSCII codes to disable each of these individually, and if you’re just typing them onto the screen you can press Esc then O to disable all three modes. Reverse can also be disabled with Ctrl+0 (zero) aka “Rvs off.”
- Underline on: Ctrl+B,
CHR$(2) - Underline off:
CHR$(130) - Flashing on: Ctrl+O,
CHR$(15) - Flashing off:
CHR$(143) - Reverse on: Ctrl+R or Ctrl+9 aka “Rvs on”,
CHR$(18) - Reverse off: Ctrl+0 aka “Rvs off”,
CHR$(146)
The printing system keeps track of the text color as its own mode, using that color for printing characters. The blinking cursor is drawn in the current text color. C64 fans know the color changing keys quite well: Ctrl or Mega plus a number key 1 through 8 accesses sixteen colors, as labeled on the number keys themselves. The corresponding PETSCII codes are scattered a bit (white is 5, red is 28, green is 30, etc.), so you’ll just want to look those numbers up in the User’s Guide if you need them.
On the MEGA65, you can access a system palette of 32 colors for text printing. All 32 colors can be used on the same screen simultaneously. To access them using PETSCII control codes, there is a print mode for that: Ctrl+D causes the 16 color codes to refer to colors 0-15, and Ctrl+A causes them to refer to colors 16-31.
- Access colors 0-15: Ctrl+D,
CHR$(4) - Access colors 16-31: Ctrl+A,
CHR$(1)
Don’t forget that you can change an entry in the 32-color system palette to any of 4,096 colors using the PALETTE COLOR command. You can also change which color is used for printing with the FOREGROUND command (or the COLOR command). See the User’s Guide for more information.
Moving the cursor
It was very common for Commodore 64 BASIC programs to position text on the screen using PETSCII control codes that move the cursor. To print the message "HELLO WORLD" in the center of the 40x25 screen, a program might print the Home code to move the cursor to the top left corner, followed by 12 cursor-down codes and 14 cursor-left codes, then the message.
- Home cursor: Home,
CHR$(19) - Cursor down: Cursor down,
CHR$(17) - Cursor right: Cursor right,
CHR$(29) - Cursor up: Cursor up,
CHR$(145) - Cursor left: Cursor left,
CHR$(157)
BASIC 65 has a dedicated command for positioning the cursor: CURSOR col,row This may be more useful for positioning text on the screen, depending on what you are trying to print.
The terminal display supports tab column positions, similar to ASCII teletypes (and old typewriters). I won’t describe the whole system here. You can experiment with the Tab key (9) and “tab set/clear” (24) code to see what they do.
Screen effects
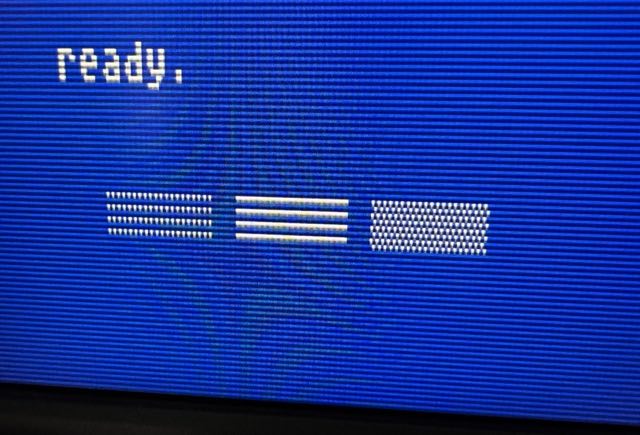
Pretty much every Commodore 64 BASIC program I ever wrote started by clearing the screen. This felt so powerful, the first step in my program taking control of the machine. The reversed heart character of the quoted clear-screen PETSCII code resonates as nostalgically for me as the blue-bordered home screen.
Press Shift+Clr/Home to clear the screen. Press it in quote mode to insert the PETSCII control code into a string, such that it clears the screen when that part of the string is printed.
- Clear screen: Shift+Clr/Home,
CHR$(147)
As we mentioned last month, the text screen can display either the uppercase character set or the lowercase character set. Each set can have 256 unique glyphs, but only one set can appear on the screen at one time. The default character set keeps uppercase letters and graphics characters in the first set, and lowercase and uppercase letters in the second set.
You can toggle between the two character sets interactively by pressing the Mega and Shift keys together. (Try it!) This toggle effect is not a PETSCII code, and in fact supersedes many program functions so you can do this while a program is running. If your program intentionally uses one set or the other, you can print PETSCII codes to select the set, as well as to disable the Mega+Shift behavior.
- Select uppercase: Ctrl+N,
CHR$(15) - Select lowercase:
CHR$(142) - Enable Mega+Shift: Ctrl+K,
CHR$(11) - Disable Mega+Shift: Ctrl+L,
CHR$(12)
Old terminals had a special code that caused a bell to ring, such as to alert an operator at the end of a long job, possibly on a printer in another room. Newer screen terminals support the bell code, mostly using it to indicate an error. The Commodore 65 also has a bell! Press Ctrl+G to hear it.
- Ring the bell: Ctrl+G,
CHR$(7)
Patterns in control codes
PETSCII codes 1 through 26 are typeable as Ctrl plus a letter of the alphabet A through Z. Ctrl+S is overridden as an equivalent to No Scroll; code 19 can be entered with the Home key. Ctrl+M is Return, and Ctrl+T is Delete, so these can’t be quoted; use CHR$() for these. As quote mode characters, these codes appear as reversed versions of their corresponding letters. (This pattern extends to other codes and PETSCII characters, though they’re less easy to remember.)
In most cases where a code is usefully paired with another, one code is in the range 0-32 and the other is the same code plus 128 ($80), similar to shifted characters. For example, code 2 enables underlining, and code 130 ($82) disables it. Not every code has a useful pair, and for whatever reason the shift enable and disable codes are simply 11 and 12.
The Commodore 65 assigns several PETSCII codes to keys that have no behavior when printed, such as the function keys. These codes are only useful when reading a keypress with the BASIC GETKEY command. In some of these cases, the corresponding Ctrl keys perform behaviors in the screen editor that do not occur when the code is printed. For example, there is no way to print a PETSCII code with the same effect as typing Ctrl+P.
Escape codes
The screen editor has some advanced features that go beyond the available PETSCII control codes. This extended set is accessible by pressing Esc followed by another key. See the appendix in your User’s Guide for a complete list. (Be sure to download the latest PDFs, which include minor updates to this appendix specifically.)
Only a few escape codes are useful from PRINT. You activate them by printing the PETSCII code for Esc, which is CHR$(27), followed by the appropriate character. As we saw last month, Esc followed by the character 5 switches to 80x50 mode in the latest version of the ROM. You can activate this mode from a BASIC program by printing these codes:
PRINT CHR$(27)+"5"
Esc then M disables scrolling of the text display. This can be useful within a program to PRINT on the bottommost line of the screen. Esc then L re-enables scrolling.
PRINT CHR$(27)+"M{home}{24 down}YOUR SCORE: ",SC
Programmable function keys
Your MEGA65 includes a row of function keys, numbered F1 through F14. The seven keys act as the odd numbers; hold Shift and press one to access the even numbers. Technically, there are sixteen function keys, with the last two being the Help key and the Run key, respectively. (Press Shift + Run/Stop to act as Run.)
By now, you or your cat may have pressed these keys in the BASIC editor and noticed that they do various things. Some are super useful, and others are not obviously helpful. I know I’ve tried pressing the Help key on a Commodore 128, only to be disappointed that it just shouts HELP back at me and doesn’t appear to do anything else.
In the BASIC editor, the purpose of the function keys is to type strings of PETSCII codes. These strings are programmable! When you press a function key, it types its string as if you typed it out manually. For example, the default definition of the Help key is a string of five codes: HELP followed by the Return key. On a blank line, this enters the BASIC command HELP, which displays information about the most recent error encountered by your BASIC program. (If your program didn’t recently encounter an error, the HELP command prints nothing.)
To see a list of all of the function key definitions, type the KEY command:
KEY
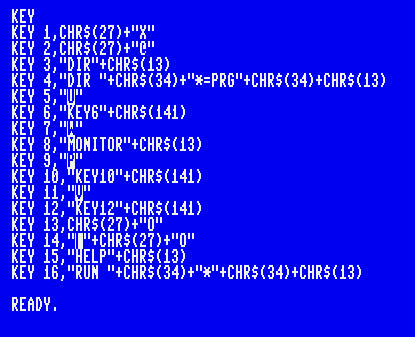
Knowing what we know about PETSCII codes, we can see how the default definitions of the function keys work. Several definitions use CHR$(27) to refer to the Esc key, entering escape codes. Others use CHR$(13) to type the Return key to enter commands. Some definitions use quoted control codes to type the equivalent key sequences.
Notice that key sequences that control the BASIC editor don’t work with the PRINT command, but they do work in function key definitions. For example, function key F9 is defined as a synonym for Ctrl + P, which scrolls a line of a BASIC program listing onto the screen from the bottom. Paired with the default definition of F11, Ctrl + V, these keys are a handy way to browse a BASIC program listing, and more convenient than using the control sequences directly.
To redefine a function key, use the KEY command with arguments: the function key number, a comma, and the string definition. For your convenience, this is how the KEY command displays the current definitions, so you can cursor up to one of those lines, make a change, and press Return to register the new definition.
It can be really handy to define function keys for project-specific tasks. For example, say you’re troubleshooting a subroutine on line 3500 that has different behaviors depending on the value of the X variable, and you want to try it with different values. You can define the function keys F1 and F3 as follows:
KEY 1,"X="
KEY 3,":GOSUB 3500"+CHR$(13)
Now you can test the subroutine quickly: press F1, enter a value for X, then press F3.
Once you have function key settings that you like, you can save them to a file on disk, then load them again later. These commands are KEY SAVE "filename" and KEY LOAD "filename", respectively. Save your project-specific definitions on disk with your other project files. You can even have multiple definition files and load them as needed.
KEY SAVE "MYPROJ-KEYS"
Control codes in petcat
In the December 2022 issue of the Digest, I mentioned a handy tool for developing MEGA65 BASIC programs on your PC called petcat. This tool is distributed with the VICE suite of Commodore emulators. It converts between PETSCII characters and an ASCII text-based syntax, so your programs can include all of the possible characters even though your PC doesn’t have a Commodore keyboard.
For the more unusual PETSCII characters and control codes, petcat has a label syntax using curly brackets, similar to what we used earlier for codes like {red}. You can type these labels directly into your text file, and petcat will generate the equivalent PETSCII code when it makes the PRG file.
To my knowledge, there isn’t an existing prose document that describes all of the petcat syntax. So I wrote one. See my new petcat syntax reference in the MEGA65 Wiki. Feedback welcome!
PETSCII is a defining feature of Commodore computers, providing a ton of display power that’s easy to use in BASIC programs. I hope it inspires you to do something great!
Cheers!
— Dan